Background
If you find this free trail guide useful, please provide payment by picking up at least one piece of litter on your hike. Cha-ching! Thanks for being awesome! (And here’s a quick primer on Leave No Trace, too, to help us keep the trails nice and fresh for each other.)
**FIVE-ALARM, ATOMIC-WEDGIE TRAIL ALERT!!!** This hike is closed as of January 2026, due to a major rockslide. Yikes! If you hear any news about a re-opening, please let us know in the comments and I’ll remove this alert. Until then (and maybe even after then), you’ll want to find another awesome local hike to visit. Wishing you safe and happy adventuring out there!
The Giant Stairs loop hike, which begins at the State Line Lookout on the Palisades Parkway, must surely have the distinction of “Best Hike With its Own Exit off the Highway” in the Hudson Valley.

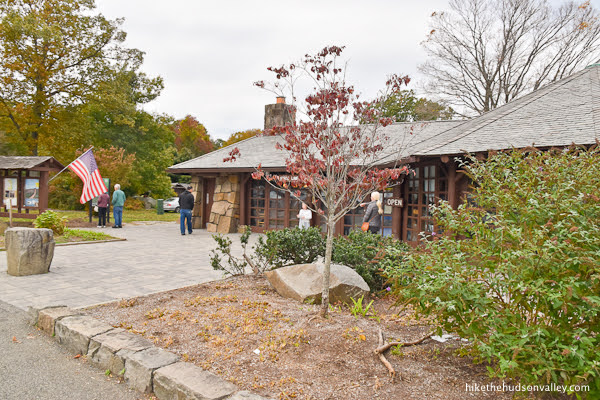
It even has a little café with a gift shop! (And, perhaps even more importantly, bathrooms!)

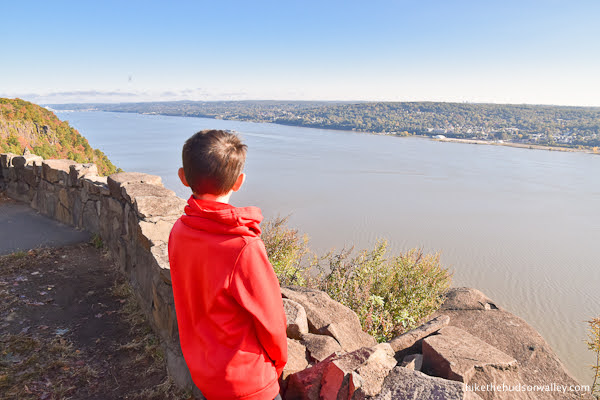
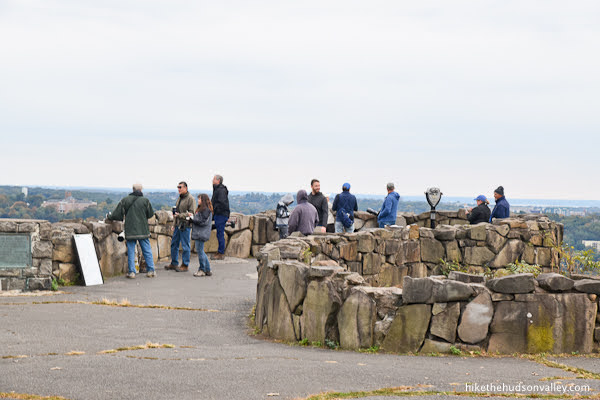
If you wanted to just pull off the Palisades Parkway and enjoy a quick view over the Hudson River without traveling more than about a hundred yards from the parking lot, you could certainly do that. The cliffs of the Palisades rise 500 feet from the Hudson River, and the State Line Overlook parking area gives you the view from atop those cliffs without requiring any work on your part.
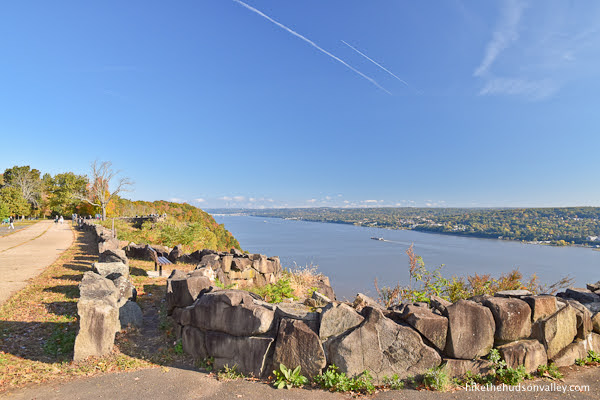

In fact, a quick stroll to a great view is exactly how most people experience this area.

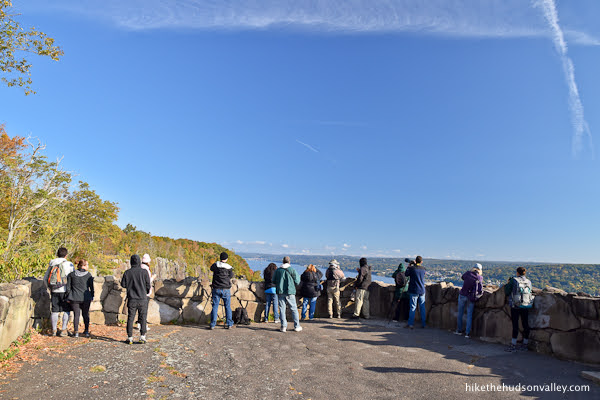
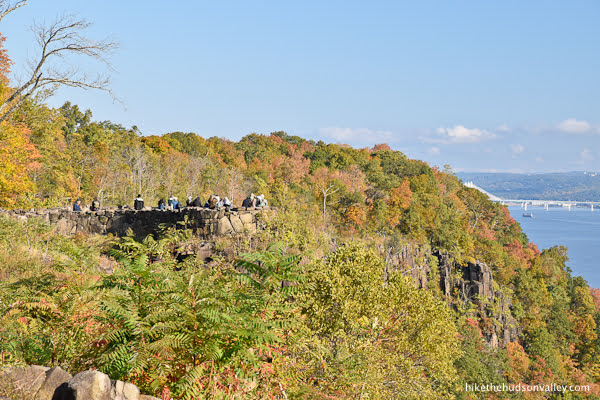
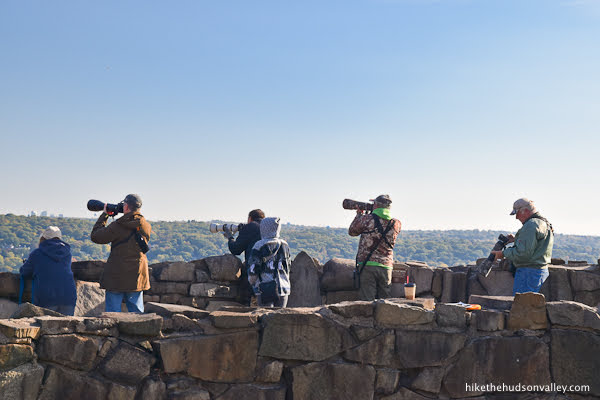
This is a popular spot for bird watching – in particular, bald eagles, with a smattering of peregrine falcons. (For a complete list of bird species and when they’re likely to be in the area, check out the bottom of this informative Palisades Hawk Watch page.) Time to bust out the big lenses!
I wonder how many people enjoy the gigantic view from the parking lot without ever realizing that one of the most unique, beautiful, and challenging hikes in the Hudson Valley sits right under those cliffs.
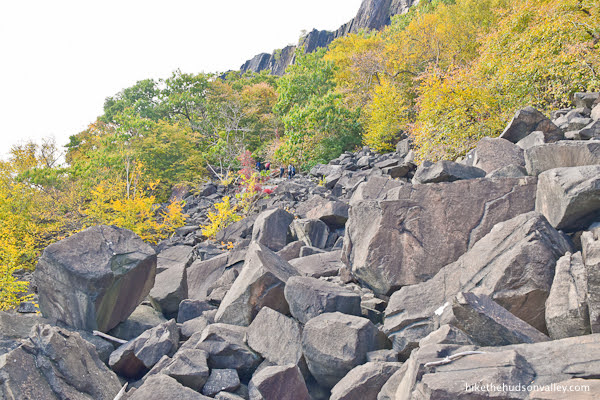

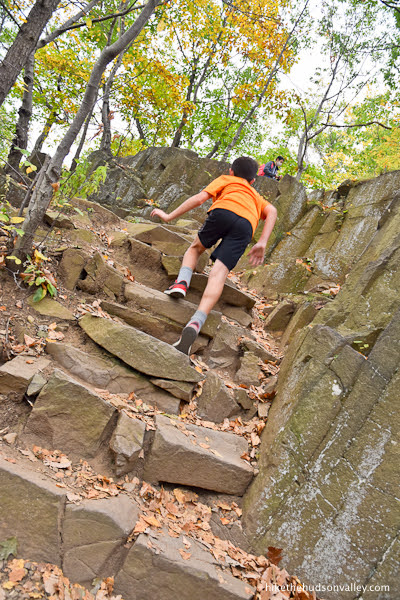
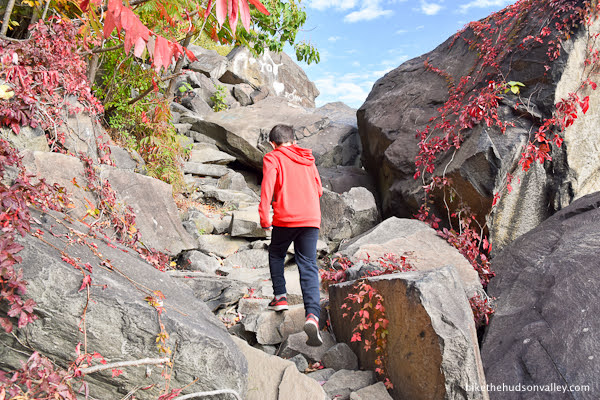
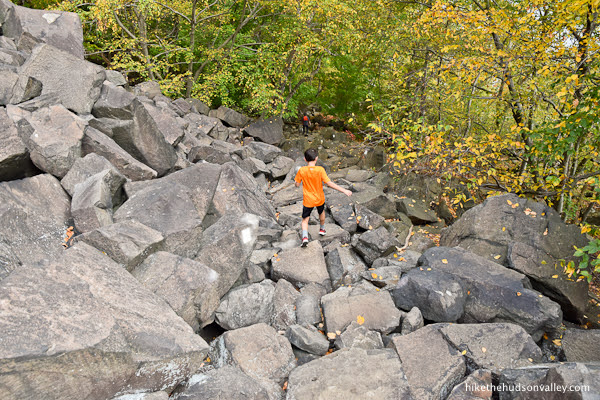
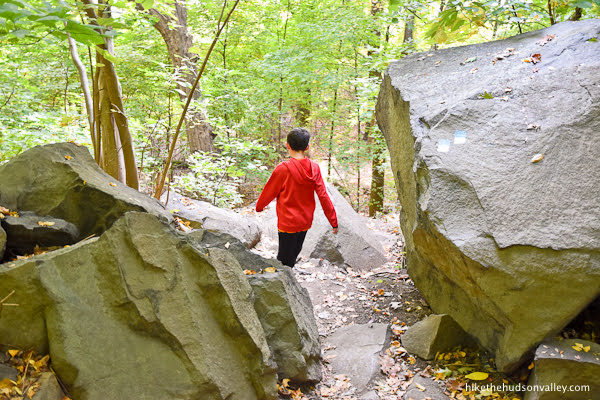
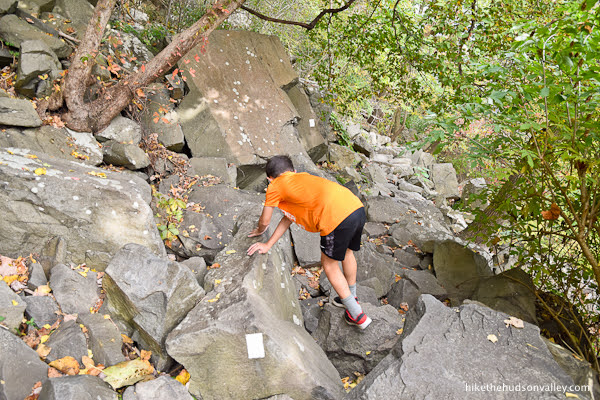
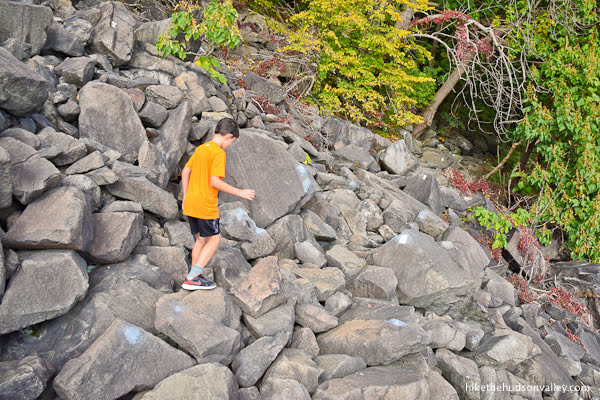
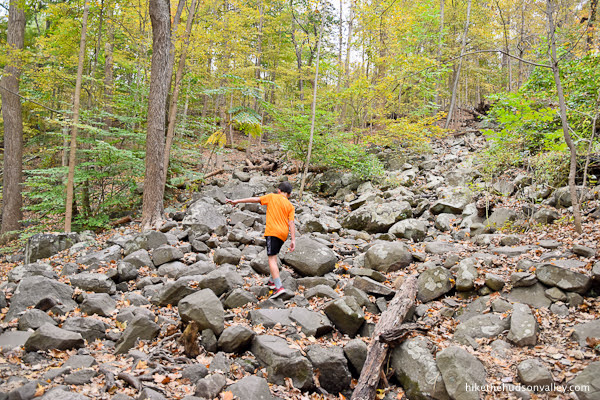
While many visitors might not realize it’s down there, the Giant Stairs hike is not a well-kept secret. Hikers flock here to clamber over the extremely challenging mile-long stretch of boulder-scrambling across an immense talus field, just underneath those towering cliffs.

Those boulders comprise the “Giant Stairs” that give this hike its name, but you’ll also find plenty of regular-sized stairs here as well.
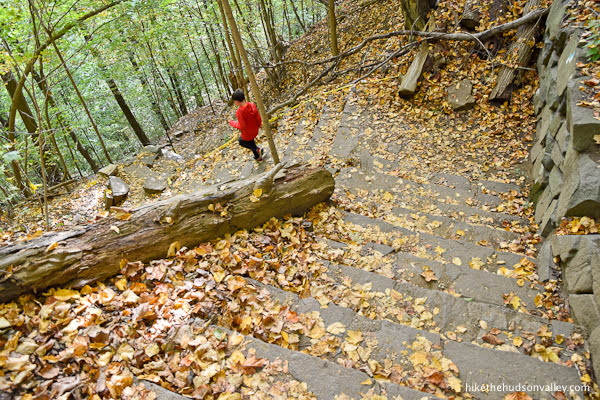
In fact, a more accurate name for this hike would be “Giant Stairs, and a Zillion Regular-Sized Stairs, Too.”
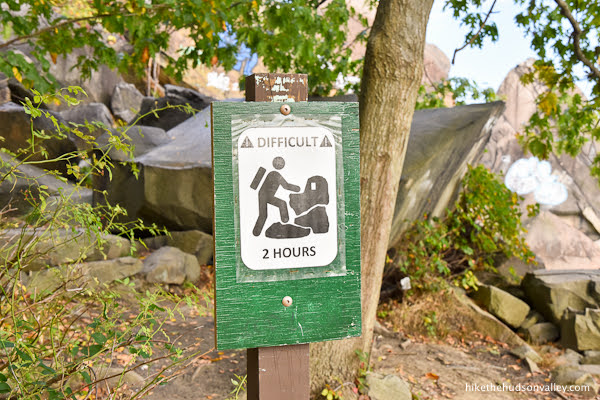
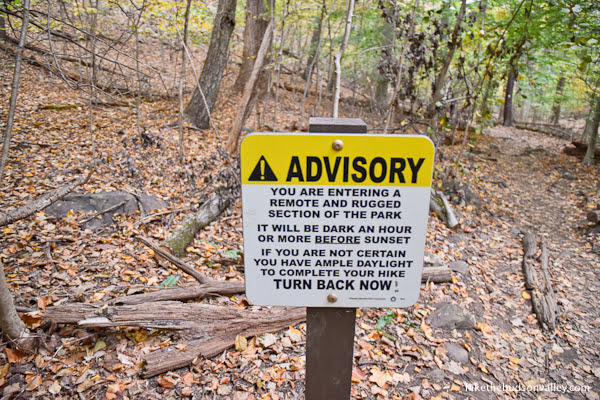
While the Giant Stairs loop officially clocks in around 5 miles (with some online estimates lowballing it to four miles), it FEELS much longer than that. The sign at the beginning of the rock scramble warns you that, during the Giant Stairs portion of this hike, you should expect to proceed at Mid-Hudson-Bridge-at-rush-hour speed: about two hours to go one mile.
You’ll probably think that the two-hour estimate only applies to other people, like a Google Maps ETA. You might be able to shave off a little time — that mile took us more like 90 minutes – but there’s no avoiding the thousands of boulder-shaped speed bumps you’ll encounter here.
Be sure to leave plenty of time to complete the loop – we were hustling to get back home for my other son’s soccer game, and we baaaaarely made it. The entire loop took us four hours, and I don’t think we could have safely completed it much quicker than that.

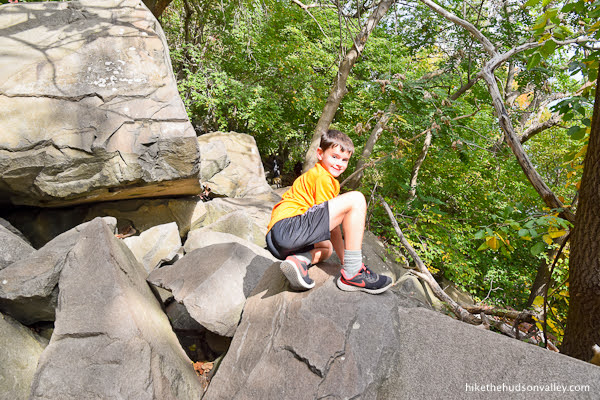
When my nine-year-old expressed an interest in going on a hike, I wanted to pick one that had a very low boredom quotient. I’d never been to Giant Stairs, but it sounded like a perfect hike for him – long on excitement, short on slogging.
As we worked our way through the rock scramble, though, I became worried I’d signed him up for too much of an adventure.
“Is this hike too hard, buddy?” I asked.
“What? This is my favorite hike ever!” he replied.
Of course, he made that comment before we had to make the final, seemingly endless ascent back to the car.
“On a scale of 1 to 10, how difficult is this hike?” I asked him.
“Eleven! But it’s still my favorite hike,” he said.
It was indeed a perfect hike for us on that day. If you decide to tackle Giant Stairs as well, may you love this hike as much as my son did. (I’m a big fan of it as well.)
You will experience many things on a visit to Giant Stairs – views, scrambles, thousands of burned calories, perhaps a waterfall, and most likely some new muscles — but boredom will not be one of them. If you’ve never visited this spot and you’re up for a challenge, be sure to pay Giant Stairs a visit. Happy scrambling!
Other points worth mentioning:
- While I did see a couple of dogs on this hike, one of them was whining and trembling, trying to pick a path through the boulders, obviously quite scared. The owner picked the large dog up and placed it on the next boulder, but with many thousands of similar obstacles ahead, I wondered how they would possibly get through the entire scramble. The happiest dog we saw was a chihuahua poking its head out of a backpack. If you’ve never done this hike before, I highly recommend doing it without your dog first (unless your dog fits in your backpack), so that you can make an assessment. I have always loved hiking with my dog, but I would not bring her here. Even if she could do it, I think it would be a stressful experience for both of us.
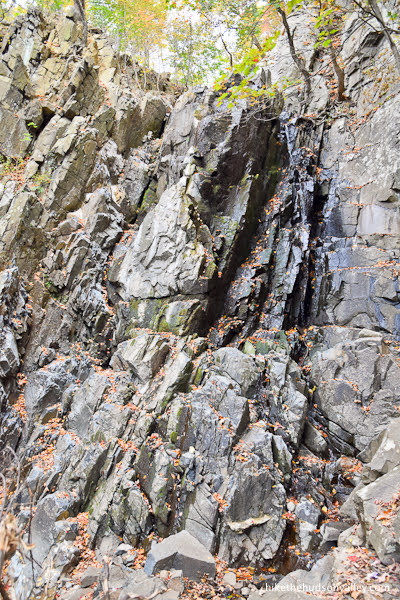
- Peanut Leap Cascade, which you’ll encounter just after completing the rock scramble, can be an amazing waterfall or a damp rock face, depending on how much rain there’s been recently.On our late October visit, it was a damp-rock situation.

I work with someone who did this hike later in the same week, after some significant rainfall. Here’s his picture (same spot, three days later):
Photo courtesy of Dan Acevedo – thank you, Dan! If the waterfall is one of your motivations for choosing this hike, be sure to visit after some rain. Otherwise, enjoy the damp rocks!
- This hike is gnarly even in dry conditions. While I just advised visiting after a rainfall to see the waterfall in full effect, be sure to give the rocks time to dry. This hike would be quite dangerous in wet conditions, and traction equipment (microspikes or similar) would be mandatory if there’s any chance of snow or ice.
- The Palisades Interstate Park offers 30+ miles of trails to explore, so you have plenty of other nice hiking options if the Giant Stairs hike is not your Nalgene bottle of tea.
- Just in case you’ll be looking for pre- or post-adventure vittles, here’s a link to the menu at the State Line Lookout Café. (Go ahead and add the fries. You will certainly have earned them.)
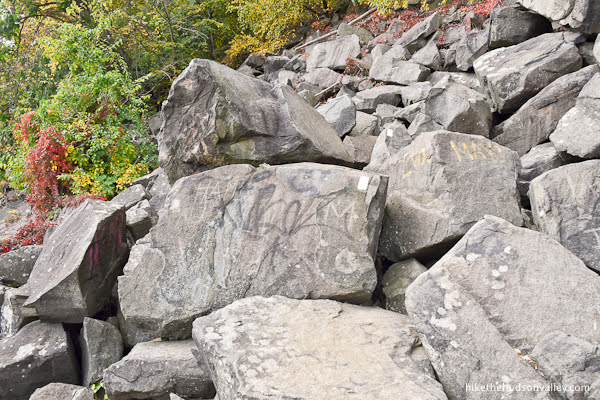
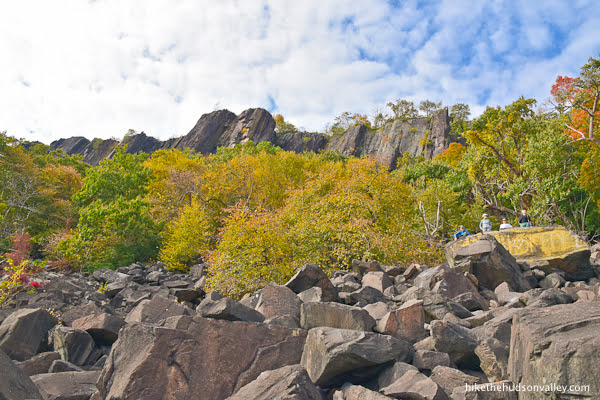
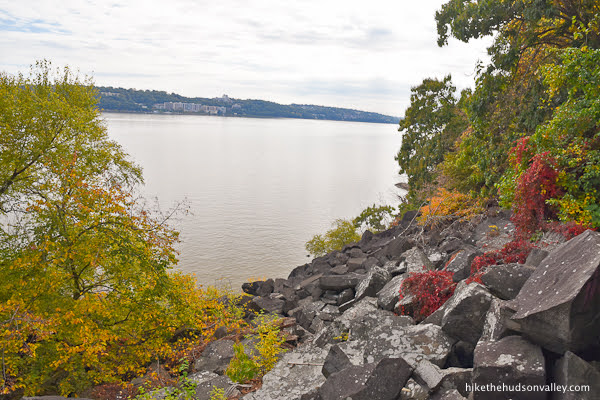
- The best views along the Giant Stairs occur at the site of a 2012 rockslide that opened sweeping vistas of the river below and the cliffs above.

Though the cascading boulders blasted a path hundreds of feet wide through the trees, thankfully (and amazingly, with such a popular trail running under the cliffs), nobody was hurt. You can see the path of the 2012 rockslide in the photo in the kiosk outside of the café.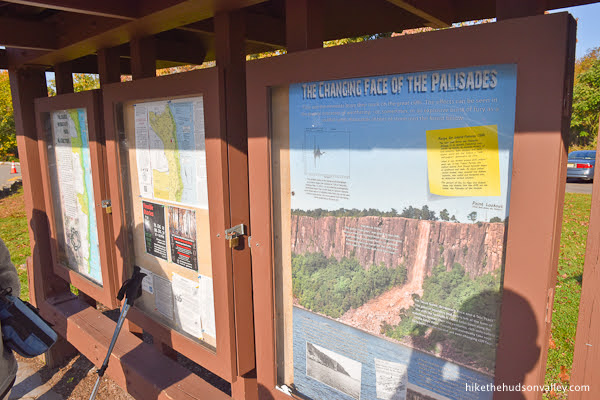
While the rational part of me knows that I’m far more likely to get crushed by a vending machine than a Palisades rockslide, some anxious thoughts did cross my mind while we were scrambling over that huge field of boulders, just below the cliffs.You know how all those boulders got there? Quickly! (After gravity kicked in, that is.)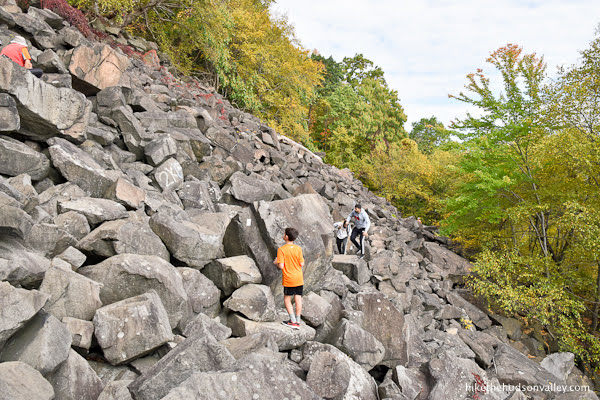
In an interesting 2012 article from Columbia Climate School, “Rock Fall Shakes New Jersey Palisades,” you’ll find this quote:Over millions of years, other rocks surrounding the basalt columns eroded, leaving sheer faces with long vertical cracks that make the Palisades susceptible to rock falls, especially during spring, as ice frozen into crevices thaws, loosening the outermost face.
Of course, YOU won’t get hit by a rockslide. I was just a little worried that WE might. It’s the same way I know everyone else won’t get eaten by a shark, but when I’m swimming in the ocean, I give my own chances at about 50/50.
Anyway, try not to think about all that. (Sincere apologies for giving you this insight into my neuroses — I hope you didn’t catch any of them.)
Enjoy your hike!
**UPDATE January 2026** Well, maybe I’m not so neurotic after all! The Palisades Interstate Park posted this update on January 9, 2026:
Looks as though nobody was hurt, thankfully. It’s so very fortunate that this rockslide happened in January, and not on a beautiful summer weekend, when the trail would have been packed.
In any event, this hike is closed until further notice. If you see any updates that it’s open again, please let us know! But man, if you’re comfortable hanging out under those cliffs again anytime soon, I bet sharks don’t even cross your mind when you’re swimming in the ocean.
Trail Guide
Bonus unsolicited advice: Don't depend on having cell service in the woods - it can be spotty out there! Download this trail guide to your phone before you head out. (It's easy to do on iPhone and Android.) May your connection to nature be strong, even when your connection to the internet is weak.
1. From the State Line Lookout parking lot off the Palisades Parkway (see “Directions to the trailhead” below), face the café.

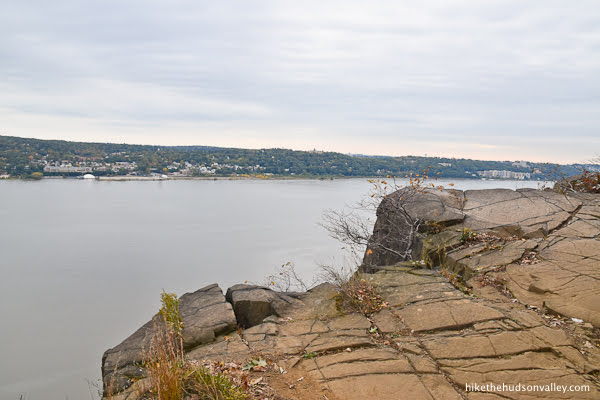
The trailhead is to the left of the cafe, but first, to your right, you should really go check out the view, just beyond that stone wall. Go ahead and take a quick stroll over there.

Dude, we didn’t even do anything yet, and check out this view!

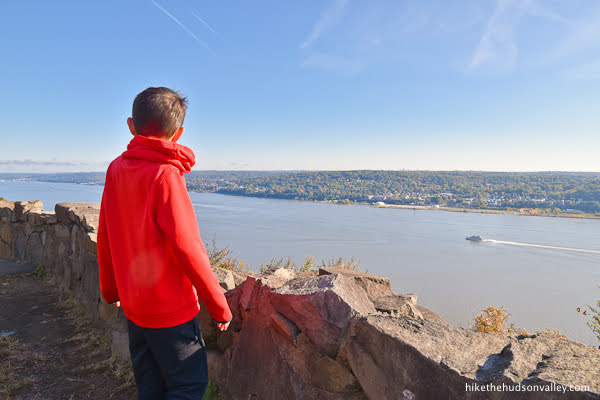

The cliffs of the Palisades rise 500 feet from the Hudson River, right up to where your little tootsies are currently located. During this hike, we’ll be hopping-and-skipping along rocks that have the river’s waves lapping against them. Which is to say, we have a long way down (and a long way back up) ahead of us.
Let’s get to it, then!
2. Head back to face the café again.
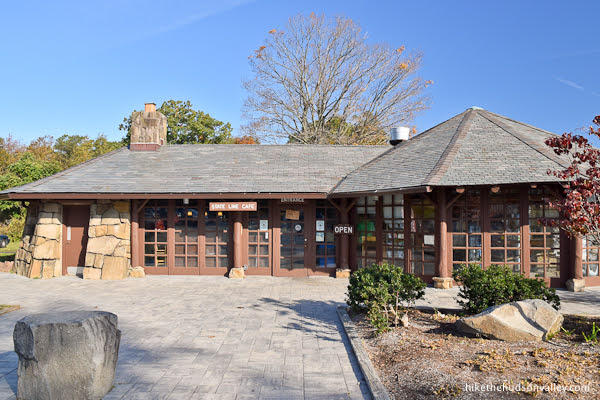
From the sidewalk to the left of the café, check out the educational signage. Might as well learn something while we’re here.
The trailhead is not obvious from here – it is tucked away to your left (assuming you are facing the educational signage), at the back corner of the parking lot.
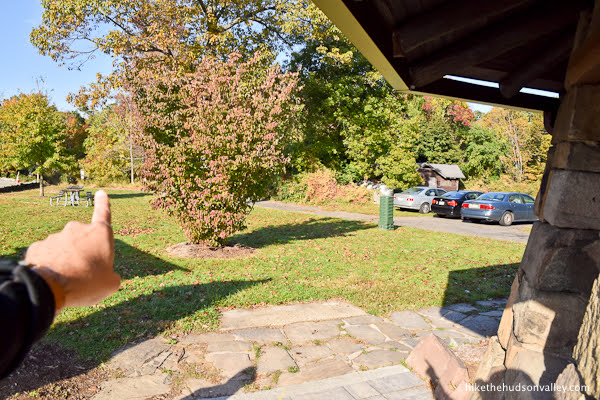
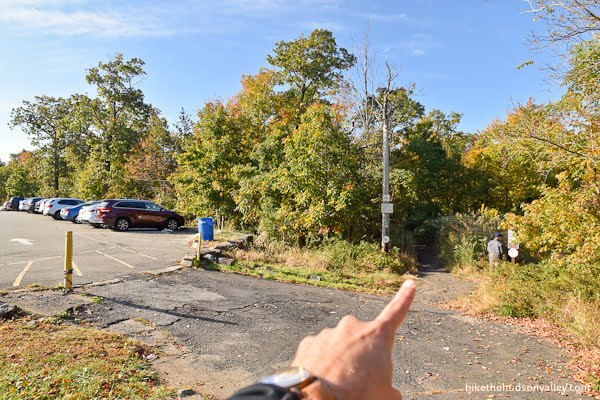
Follow the edge of the parking lot to the gravelly start of the trail, walking directly away from the river and the café.

A few small signs mark the trailhead, just beyond the farthest point in the parking lot from the entrance road. Did you find the spot? Hooray! That’s the hardest part of this hike! (Except for all the actual hardest parts.)
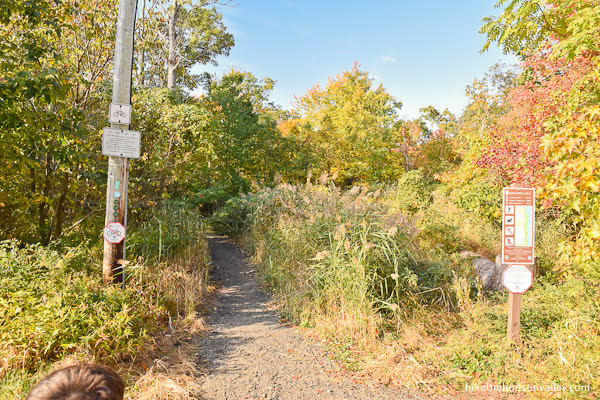
3. We are hopping on the Long Path here, which runs 358 miles from the 175th Street Subway Station in NYC to Thacher State Park near Albany. (We are headed south, so if you miss the turn to do the Giant Stairs hike today, maybe you can console yourself by catching a Broadway show?)
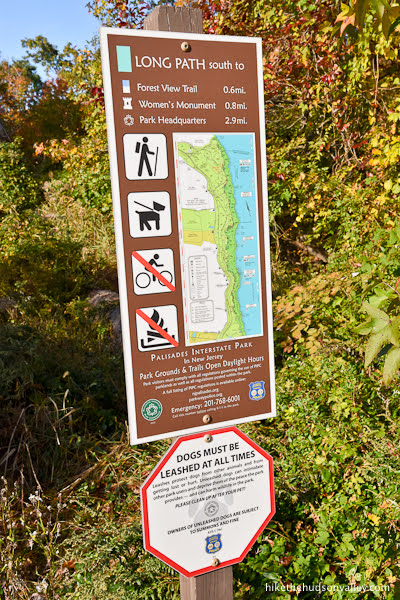
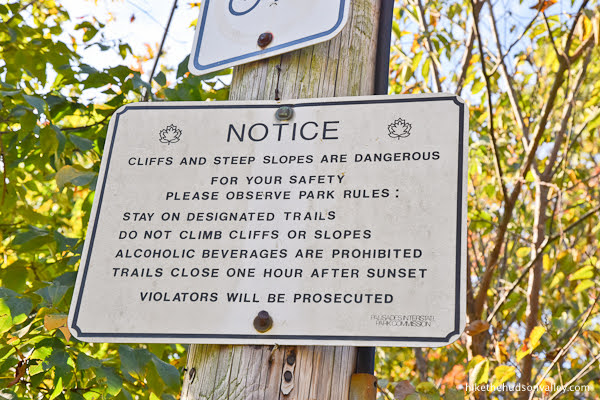
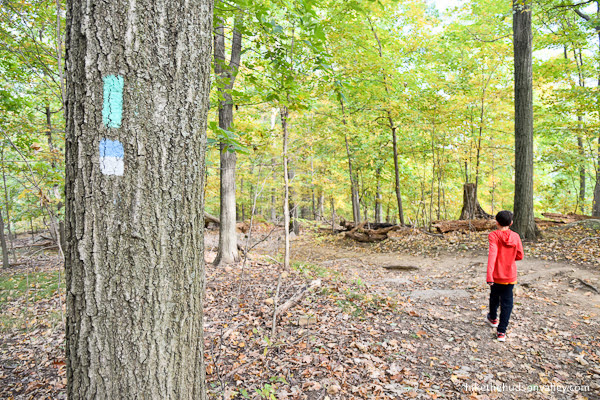
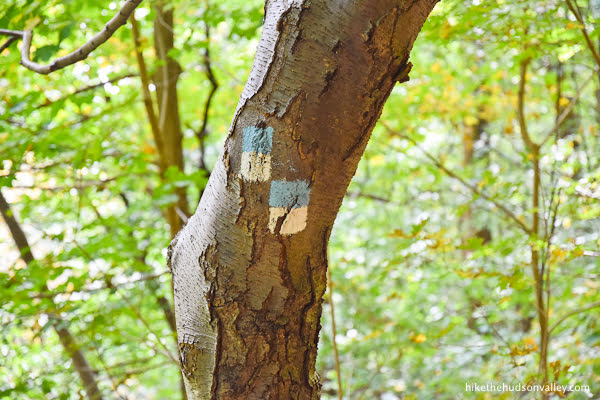
Acquaint yourself with the posted rules (namely, stick to the trails so you don’t fall off a cliff), and let’s get started – follow those teal blazes!
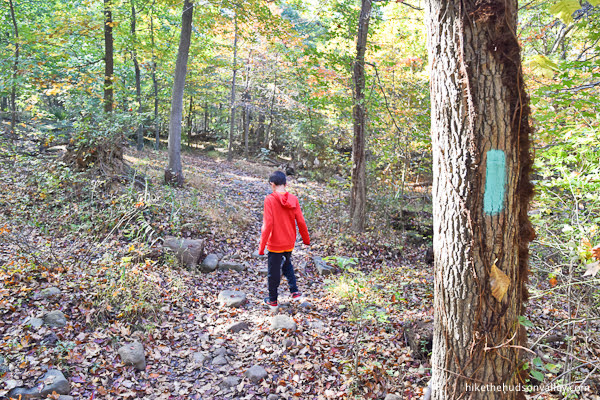
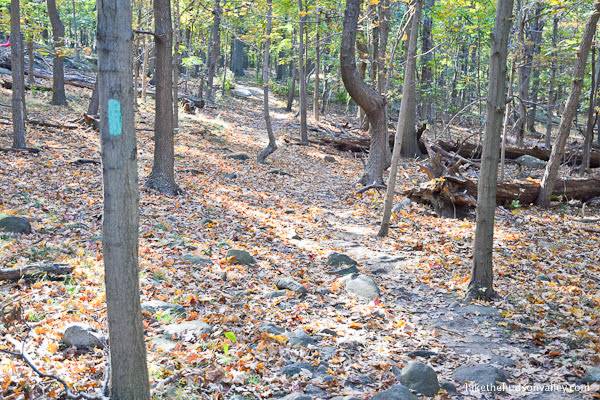
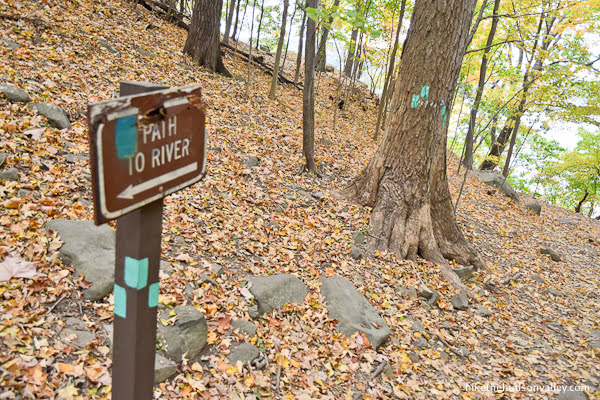
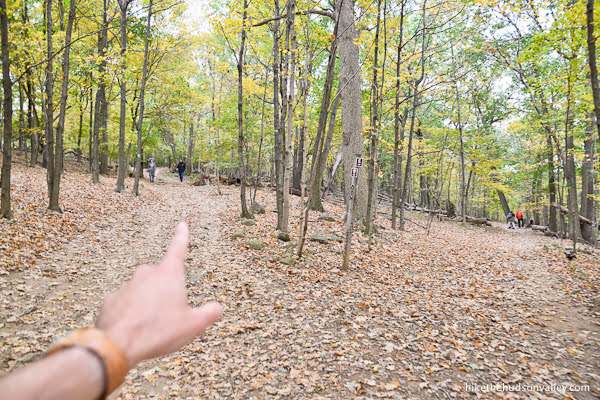
4. In just a minute, you’ll arrive at a junction with the teal blazes indicating a turn to the left, and some (possibly confusing) signs that point you toward “A.” There are some cross-country skiing trails in these woods, marked with catchy single-letter names. Don’t worry about the letters and just stay tuned-in to those teal blazes.

Turn left at the “A” intersection to keep following the teal blazes.

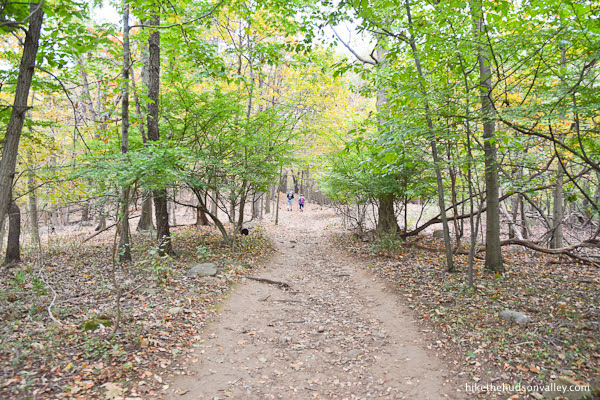
5. Enjoy the flat stroll through the woods, assuring any bored co-hikers that this hike will indeed eventually have boulders.
Less than ten minutes from the “A” intersection, you’ll arrive at – you guessed it! – the “B” intersection.

Turn left here to continue following the teal blazes of the Long Path.
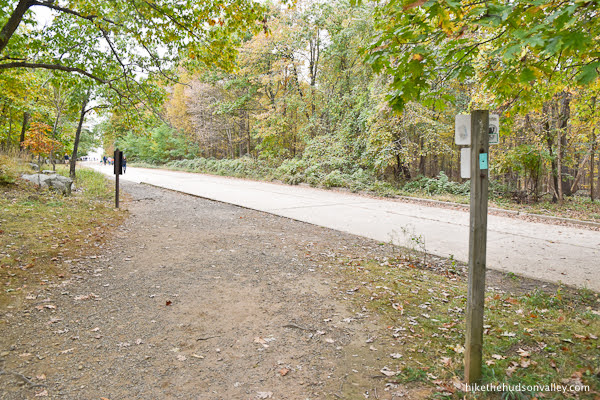
6. Less than two minutes from the “B” intersection, you’ll arrive at – you guessed it! – a road crossing.

Wait, you guessed “C” intersection? That’s so silly.
Carefully cross the street – this is a busy road and people drive fast! (This crossing offers the unique opportunity to judge people harshly for driving the same speed you were driving in this exact spot twenty minutes ago.)
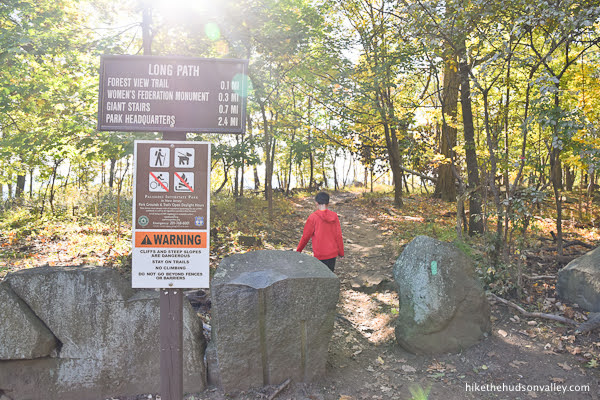
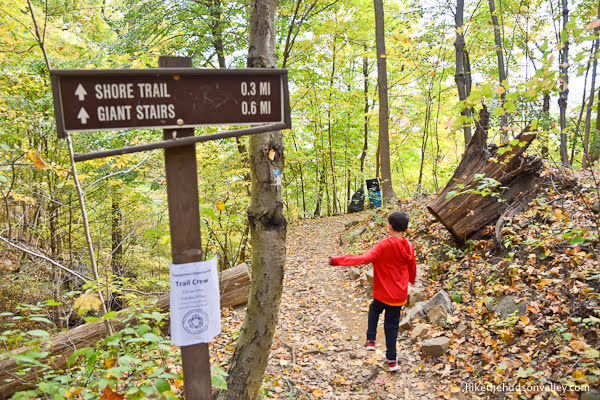
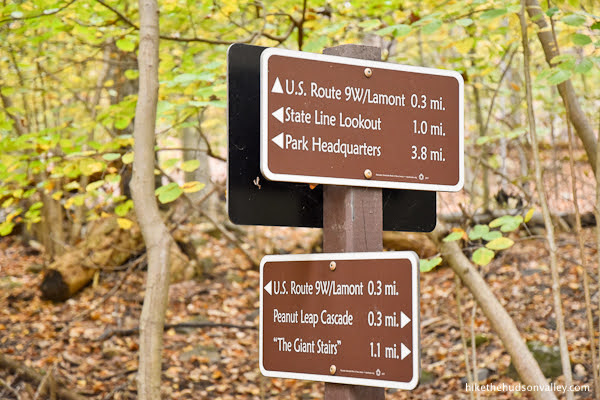
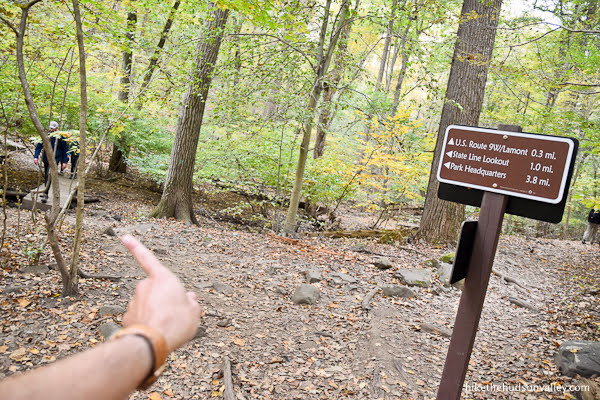
On the far side of the street, some helpful signage gives mileage estimates, letting us know we’re on the right track. Only .7 (extremely steep) miles to Giant Stairs! Woo hoo!

Continue straight past the sign (and the boulders behind it) to stay on the Long Path.
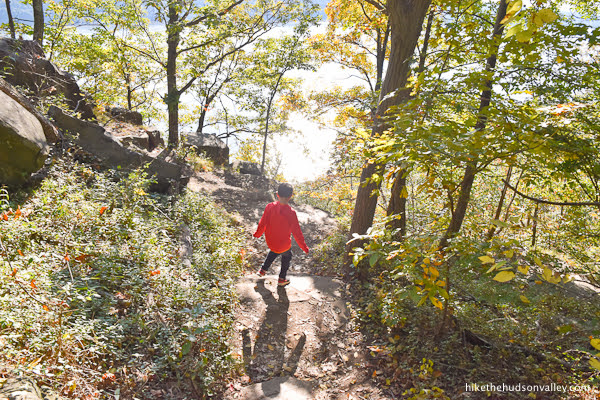
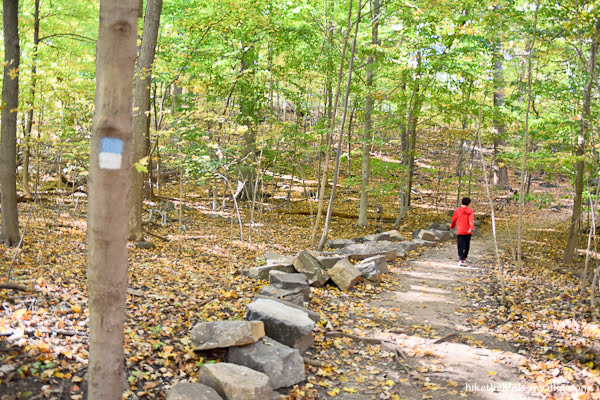
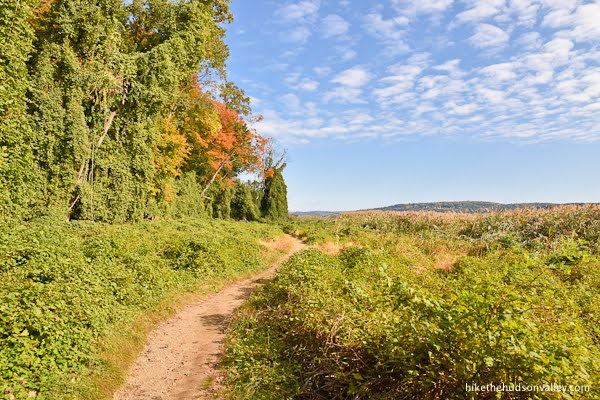
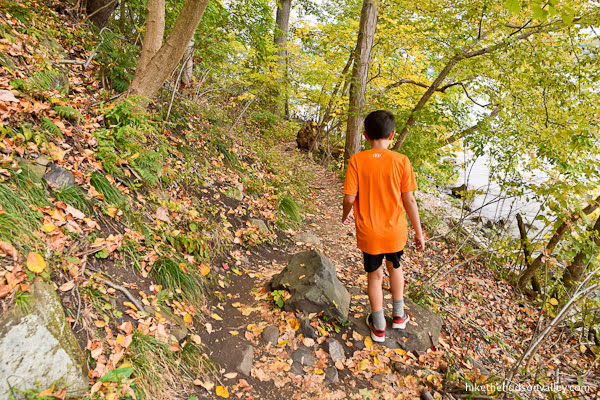
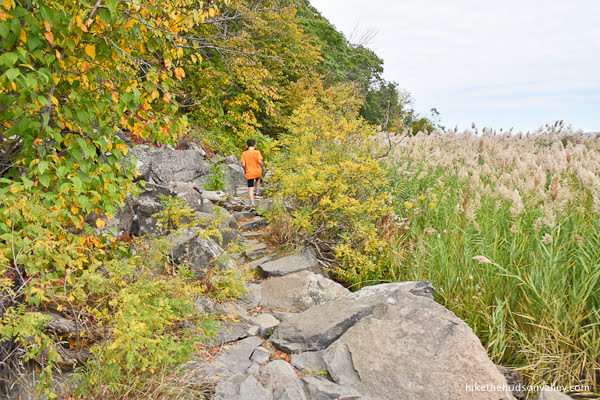
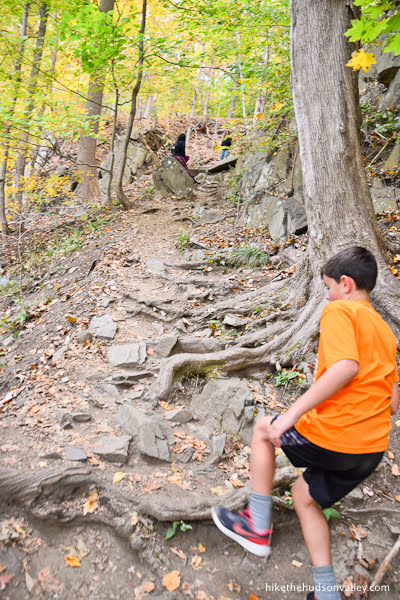
7. Enjoy your last stretch of flat strolling, catching occasional views through the trees.
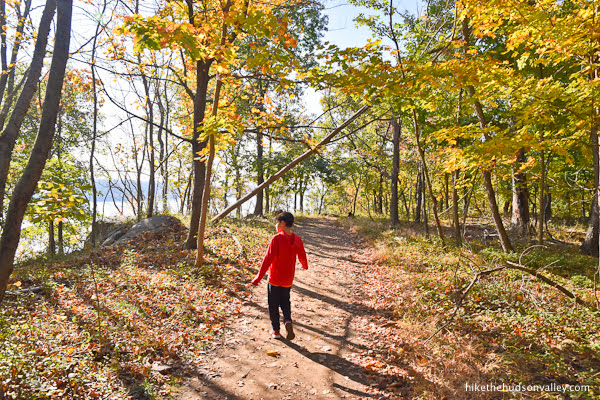
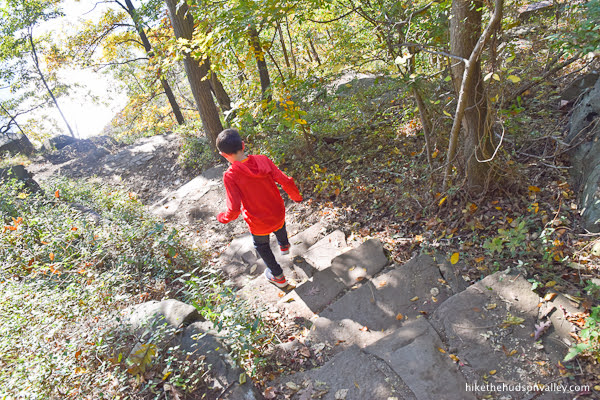
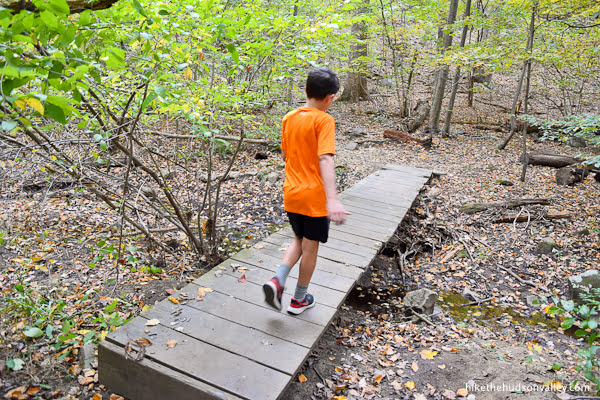
In a few minutes, the trail begins a steep descent on the first of the (approximately) seven zillion stone steps you’ll traverse today.
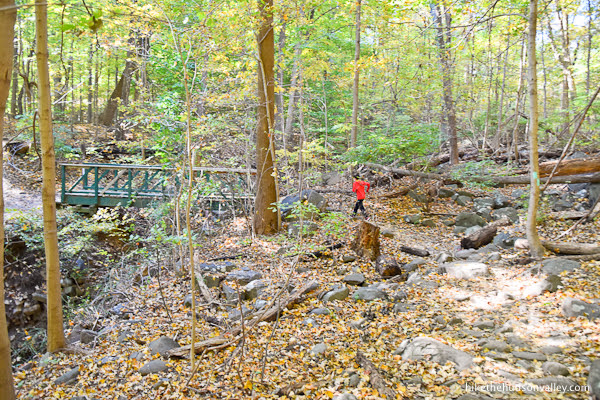
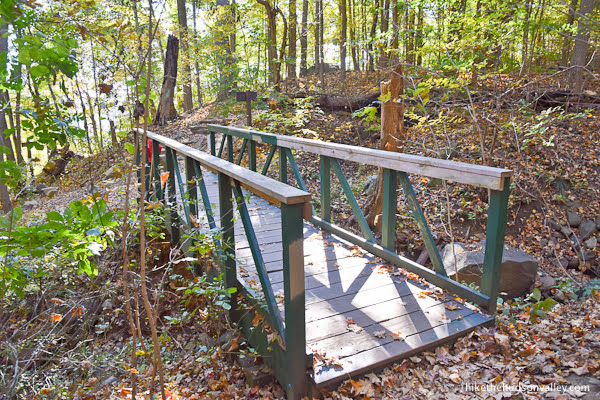
About five minutes after the road, you’ll cross a picturesque wooden bridge, arriving at a junction that offers an optional visit to the Women’s Federation Monument. It’s decision time!
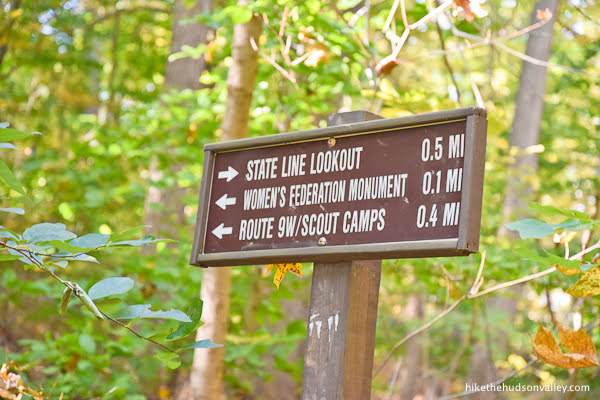
8. Optional step! Visit the Women’s Federation Monument, which will add about 15 minutes, 120 vertical feet, and .4 miles to your day, returning to this spot. (I know the sign says .1 miles from here, but my GPS clocked it at .2 miles. If I were you, I’d believe the sign, too, but it does FEEL like a bit more than .1 miles.)
It’s a cool monument! I would recommend checking it out, but if you’re at all concerned about having enough gas in your tank to complete the strenuous hike ahead, you can cut this part out. If you choose to visit the monument, this will be a 5.6-mile hike today, rather than a 5.2-mile hike.
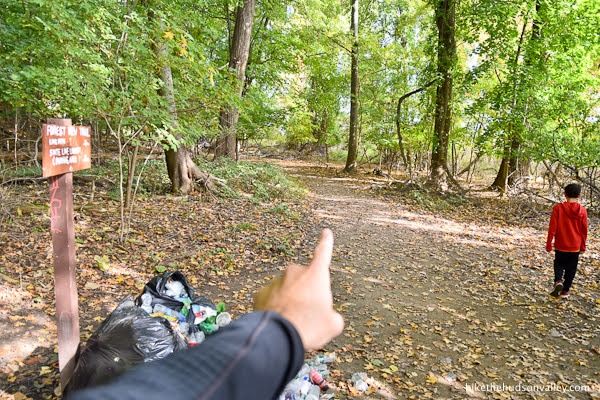
If you’re up for it, turn right here to follow the blue-and-white blazes of the Forest View Trail as they gently head uphill. (If you’re not up for it, go ahead and skip to the next step. See you there!)
This stretch is co-branded with the Long Path, so you’ll also see the familiar teal blazes on some of the trees, in addition to the blue-and-white Forest View blazes.
About five minutes from the bridge, voila!
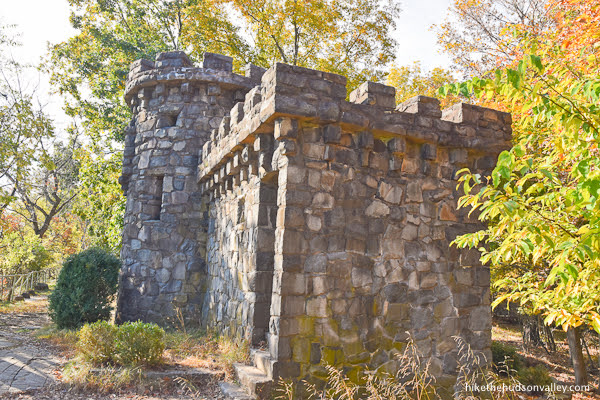
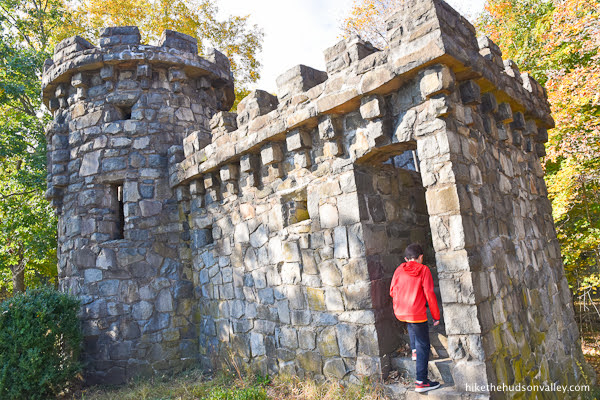
What a cool little castle, right? Go ahead on in and climb up! This is surely the best place in the Hudson Valley to reenact the opening scene from Monty Python and the Holy Grail with your friends. “Are you suggesting coconuts migrate?”
A little history on this mini-castle from NJPalisades.org:
This monument was “built in 1929 to honor the role the New Jersey State Federation of Women’s Clubs played in preserving the Palisades.”
They apparently kept this area from turning into a big fat stone quarry rubble pile – thank you, New Jersey State Federation of Women’s Clubs!
This is also great place to grab a granola bar and enjoy the view, in case you needed an excuse to bust into your snacks.
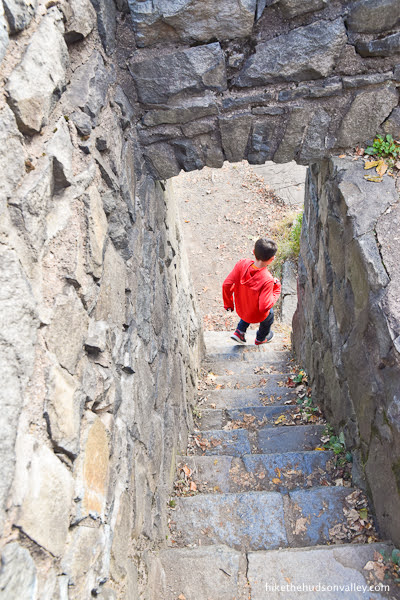
When you’re done exploring the castle, head back down the steps.
Don’t miss out on the views at the railing!


When you’re done, retrace your steps on the Forest View Trail and head back to the little wooden bridge.
That was pretty cool, right? Glad we checked it out! (Okay, let’s stop talking about it now. The people on the next step might have skipped this part, and we don’t want to make them feel bad.)
9. Whether you visited or monument or not, it’s time to bid adieu to the Long Path (for now), and head downhill on the blue-and-white-blazed Forest View Trail toward Shore Trail and Giant Stairs (straight/left if you’re coming from the bridge). Follow the sign at this well-marked junction – just .6 miles to Giant Stairs!
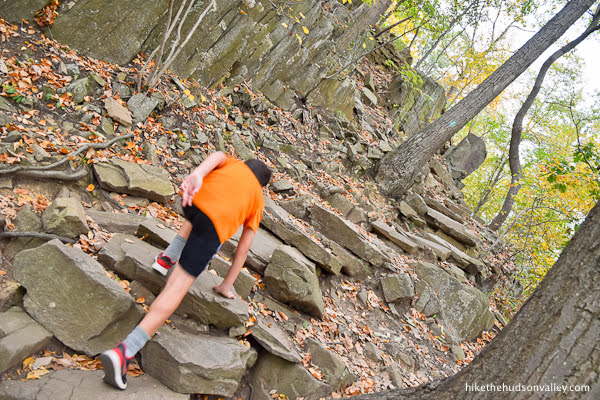
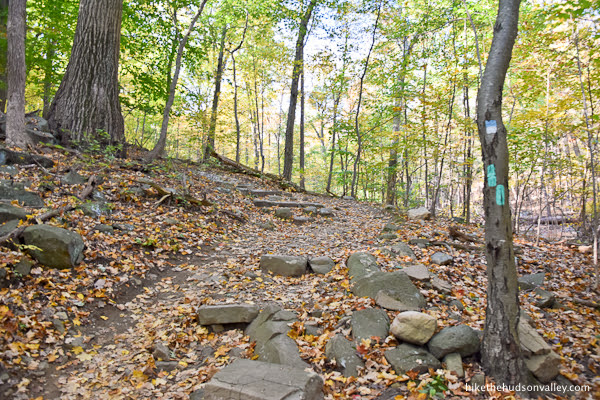
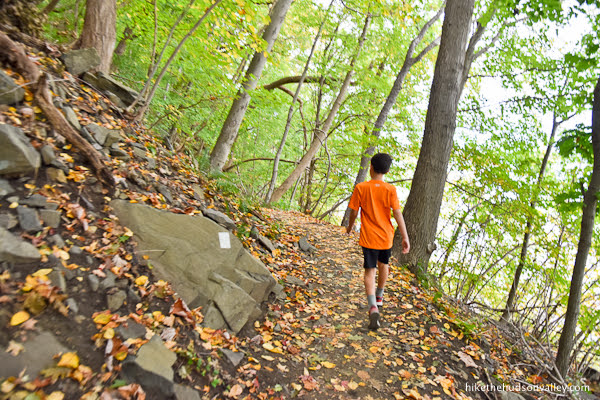
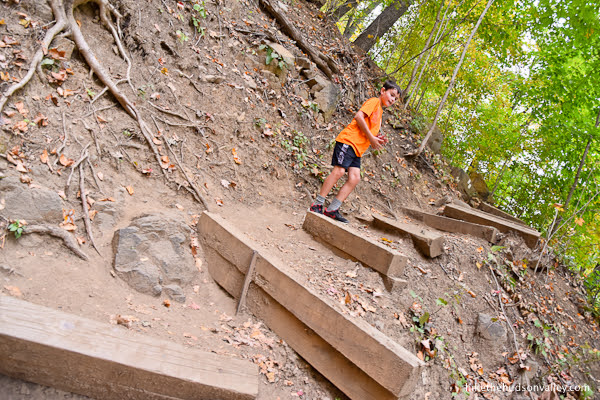
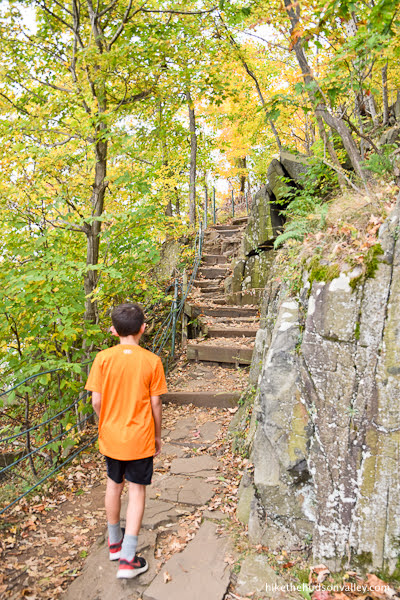
10. All of these regular-sized stairs are great practice for the Giant Stairs ahead!


Your next junction is coming up in about ten minutes from the bridge. Until then, continue descending and following those blue-and-white blazes.
11. At the bottom of the hill, you’ll arrive in a clearing with three blazes marking the end of the Forest View Trail.
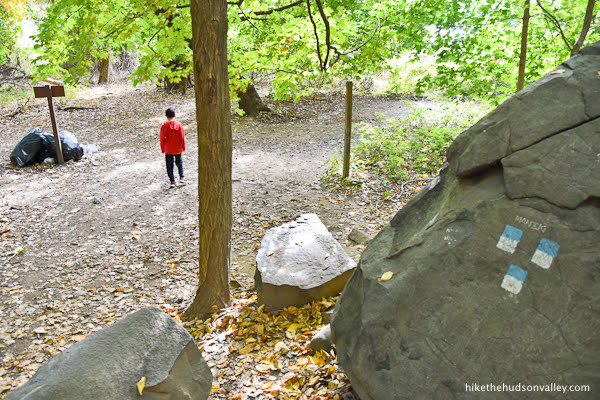
Turn left here to hop on the white-blazed Shore Trail.
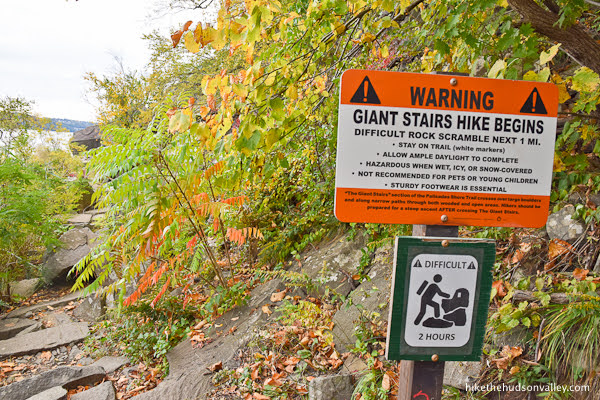
12. In just a minute, you’ll encounter a warning sign: “GIANT STAIRS HIKE BEGINS IN ¼ MILE. DIFFICULT ROCK SCRAMBLE AHEAD!”
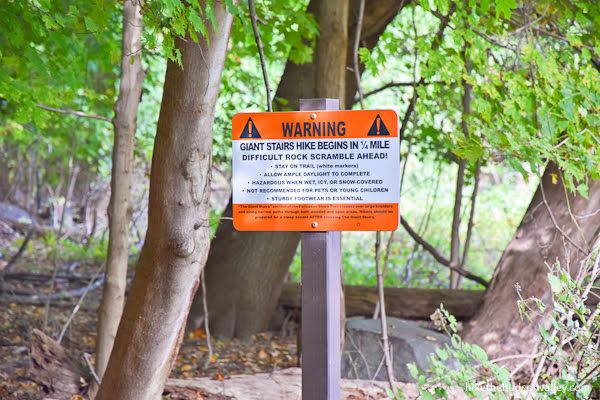
Brace yourself!
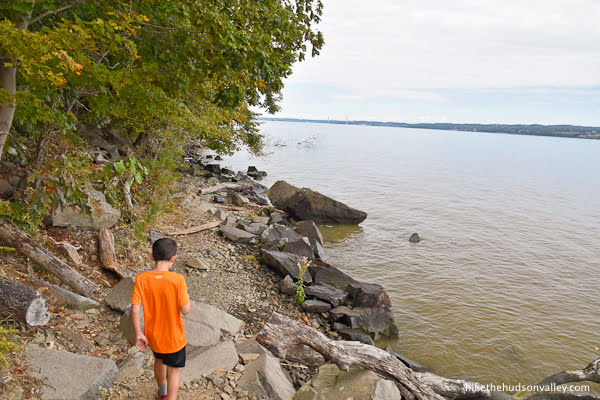
The trail ambles along, edging closer to the river. Enjoy your last easy mileage of the day.
About six minutes from the warning sign, you’ll arrive at the river’s edge, with another warning that the difficult trail ahead will take about two hours.


While two hours is a generous estimate (it took us 90 minutes to get through the next mile), it’s otherwise quite accurate. Last chance to turn back before things get interesting!
Shoes tied? Water bottles secured? Loins girded? (That last question is rhetorical – what you do with your loins is totally up to you.) Let’s do this thing!
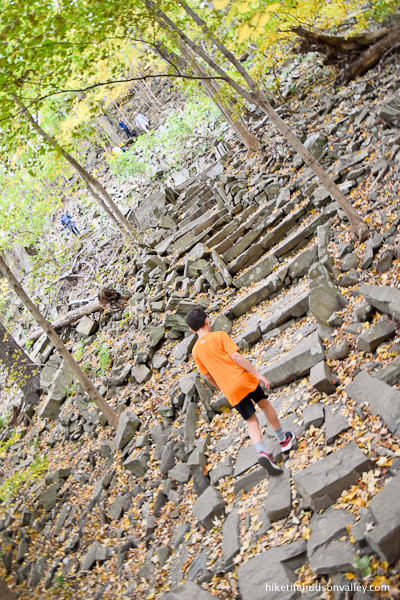
Follow the white blazes toward the rocks.
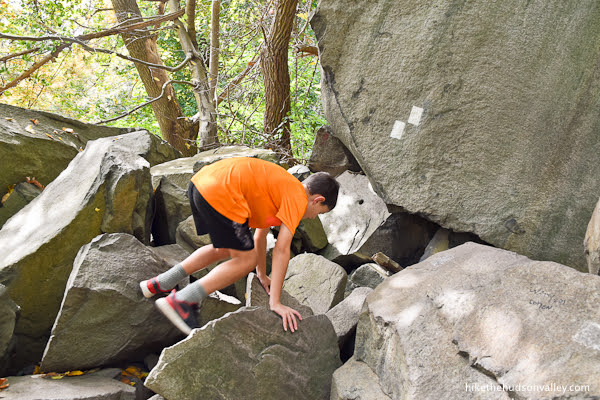
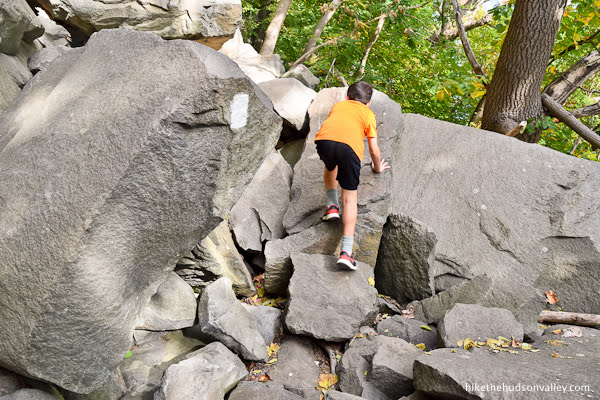
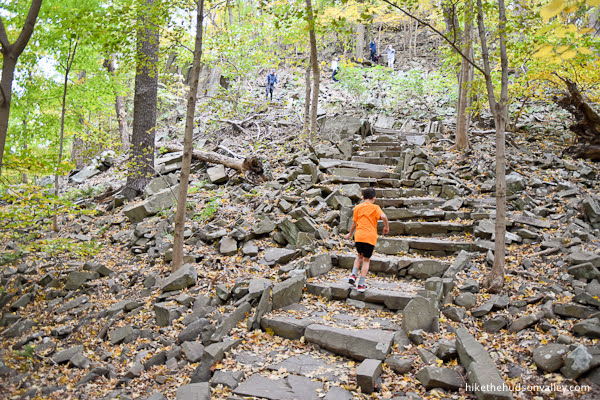
Up we go! Hello, Giant Stairs!
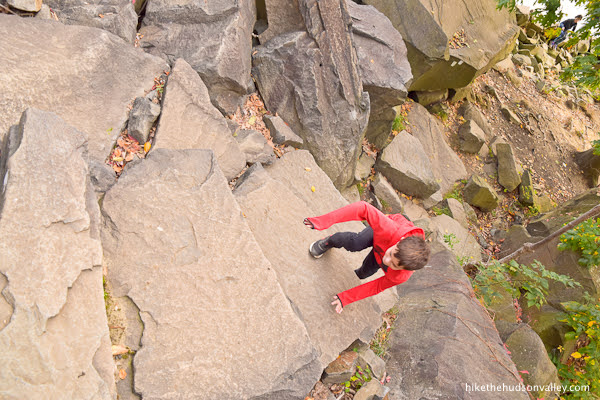
13. Keep a sharp eye out for those white blazes throughout the scramble – they will guide you to the best and safest routes.
Also keep a sharp eye out for poison ivy – while it’s easy to avoid if you’re paying attention, it is copious here.

It took us 35 minutes of careful scrambling to reach the next point of interest: An opening in the treeline that offers great views across the river. Until you get there, you should probably put this trail guide away and concentrate on not breaking any bones. Happy scrambling!

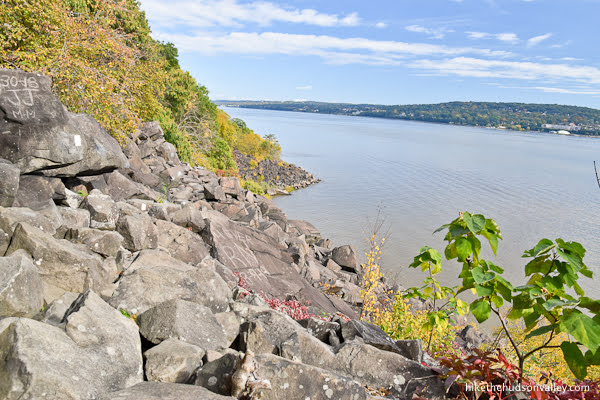
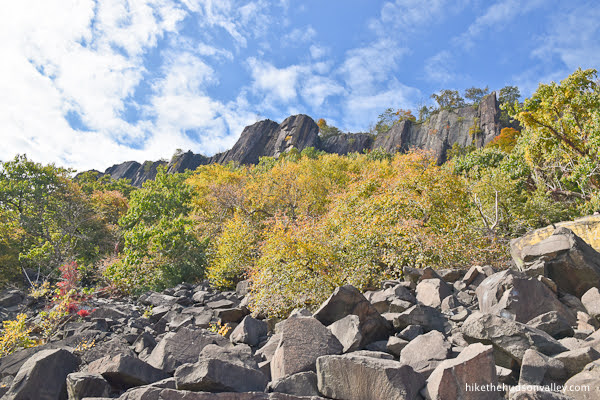
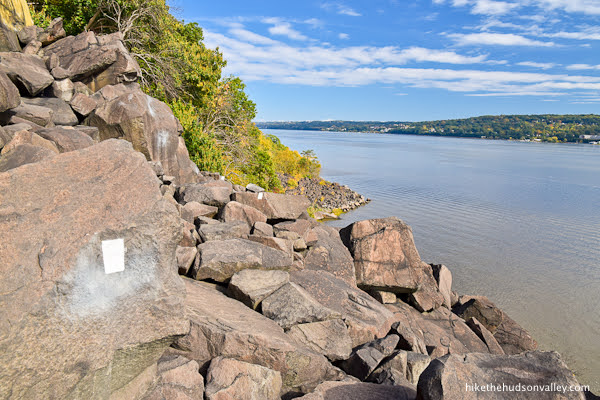
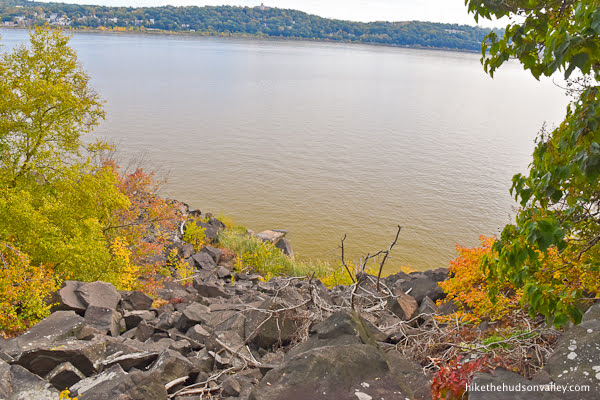
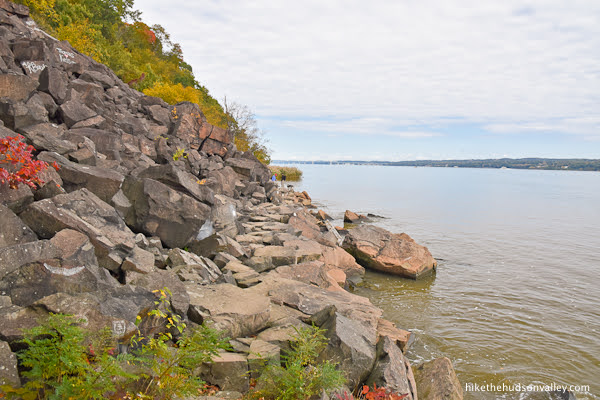
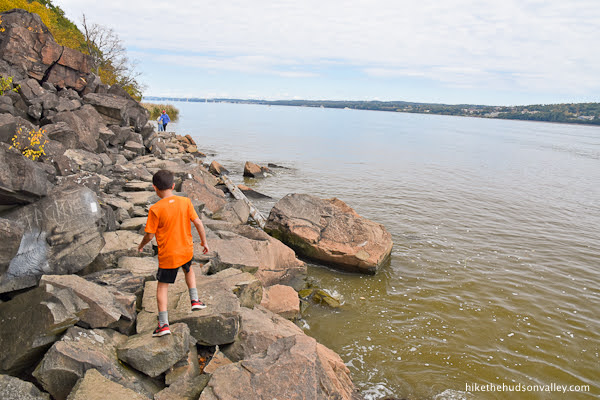
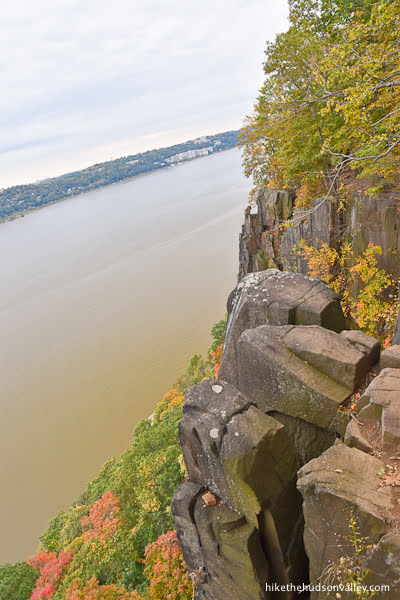
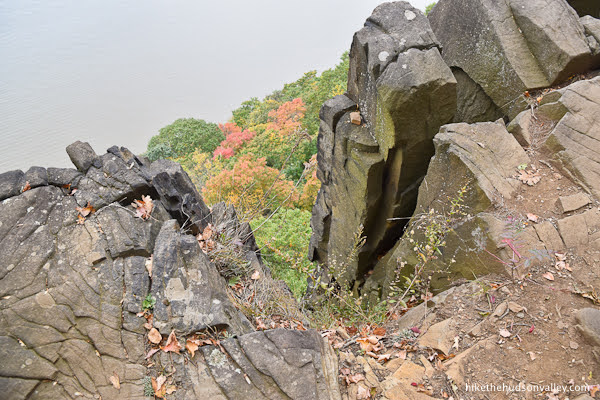
14. About halfway through the scramble, you’ll emerge onto the site of a 2012 rockslide that opened up some great views (and great rocks for hanging out upon).
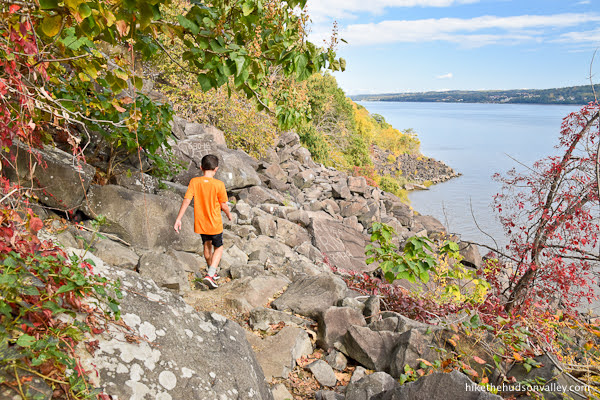
Welcome to the money spot! If you’re looking for a good place to stop and relax for a bit, this is it. You’ve earned a break, haven’t you?

Carefully pick a winning rock and sit for a spell.


High above, the Palisades smile back down at you. Hello up there, cliffs! (If you feel like you need to rockslide again, would you mind holding it in until nobody’s here?)

15. When you’re done maxing and/or relaxing, time to keep motoring. Those rocks aren’t going to scramble themselves!
In a few minutes, you’ll arrive at another spot with limited views down to the river. It’s not as panoramic as the money spot, but this is another decent option to stop and relax for a bit.
Otherwise, just keep scrambling!
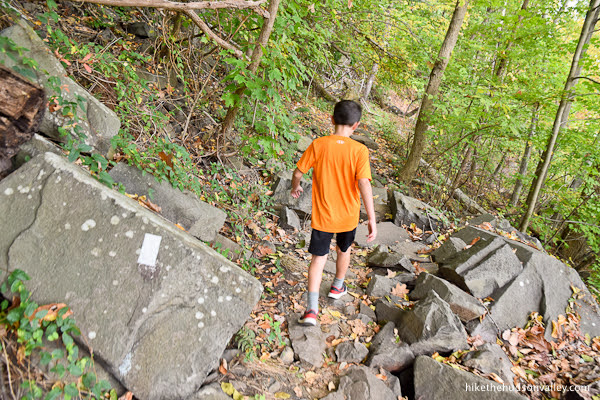
About fifteen minutes beyond the money spot, the trail becomes more of a regular trail again, where your feet are allowed to touch the ground. Ahh, dirt – we missed you! You’re so easy to walk on!
Are we going fast? It feels like we’re going really fast right now.
The Giant Stairs officially continue for another .3 miles, though the main scrambling portion is behind you (it has been almost exactly a mile since the start of the Giant Stairs, so don’t worry – you got your mile of scrambling).

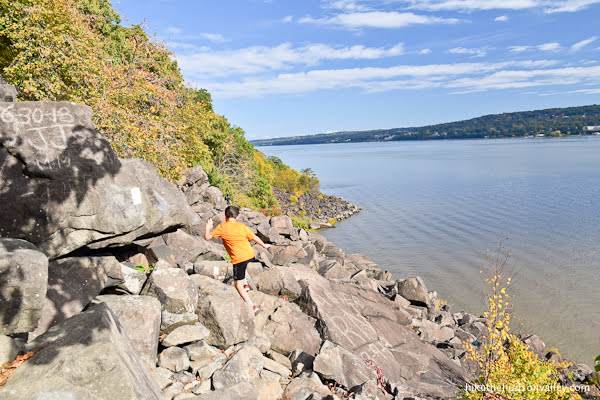
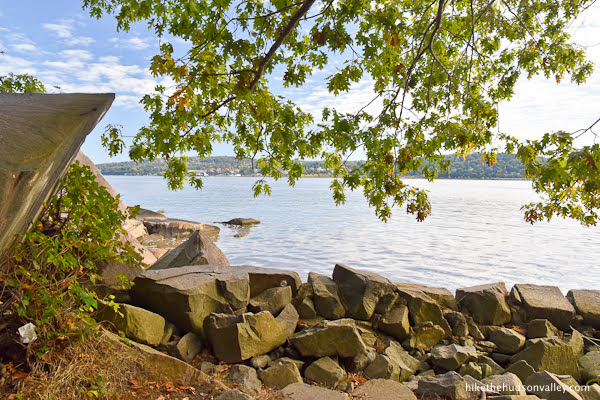
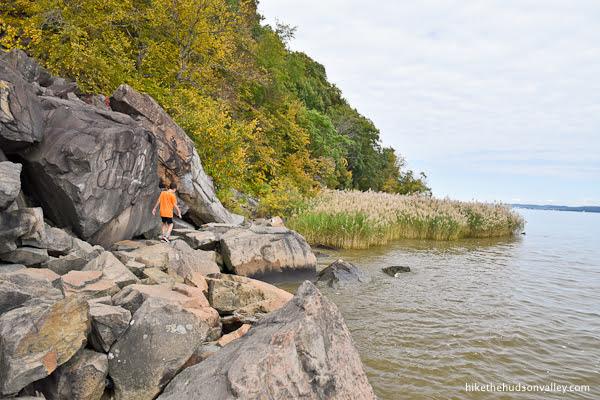
16. The Shore Trail lives up to its name – it takes you right down to the shore of the Hudson River.
Keep those tootsies dry!

17. The trail turns inland, and you’ll shortly see a sign facing hikers coming the other way, marking the beginning (or end, from our perspective) of the Giant Stairs. Phew! We made it.
18. Keep strolling along the river, and in about ten minutes, you’ll pass the “Craziness coming up in a quarter mile!” warning sign for people going the other way.

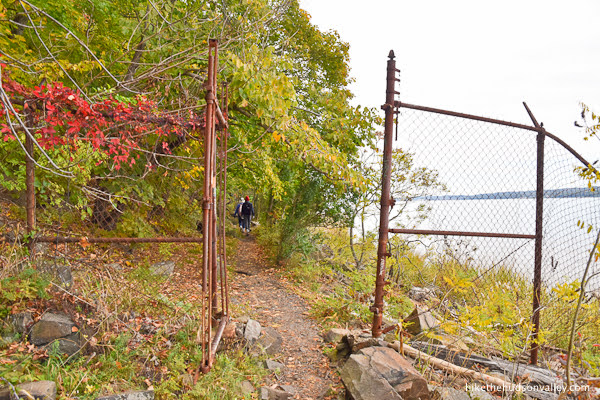
19. Immediately after that sign, you’ll cross the ultra-scenic rusty chain link fence that celebrates the border between NY and NJ.
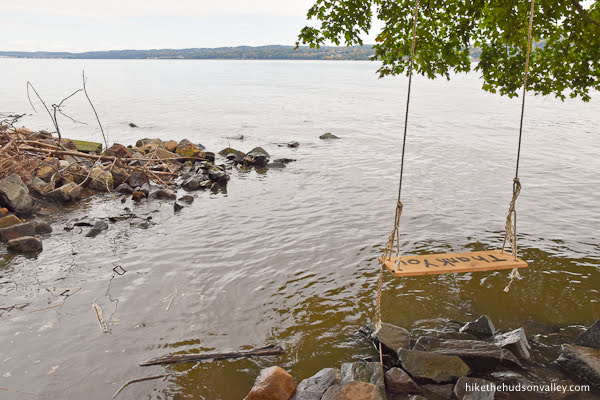
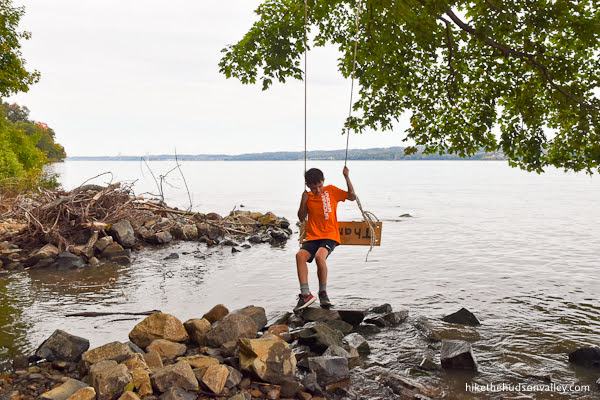
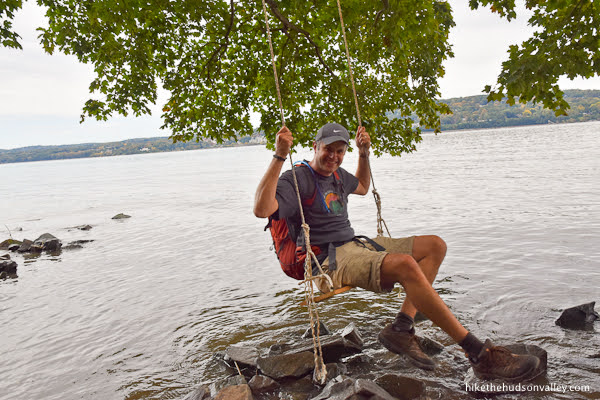
20. A few minutes beyond the scenic state border, you’ll arrive at a great piece of trail whimsy: a swing that lets you dangle precariously over the water. (This swing has apparently been here for many years — hope it’s still there when you visit!)
21. Immediately after the swing, you’ll see Peanut Leap Cascade, which can be an amazing waterfall or a damp rock face, depending on how much rain there’s been recently.
On our late October visit, it was a damp-rock situation.
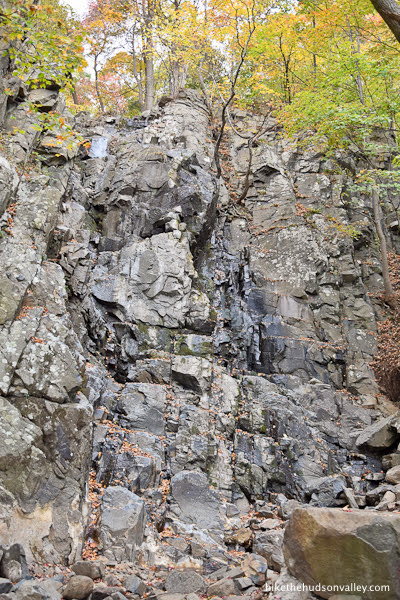
Hope it’s flowing better for you right now!
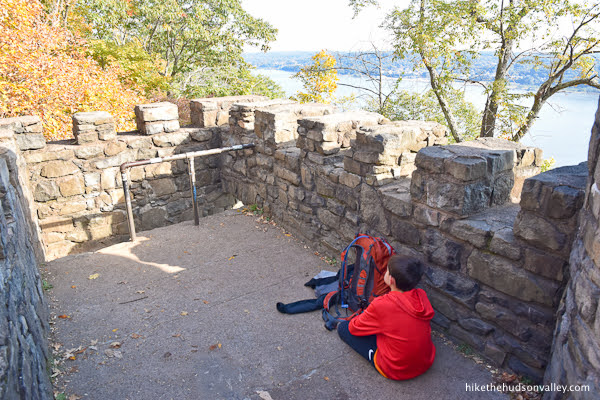
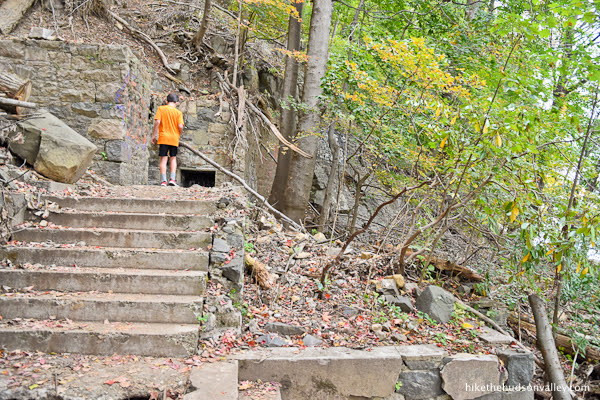
22. At the base of Peanut Leap Cascade, climb the stairs up to the ruins. These are the remnants of fancy-pants gardens from the last family to own this land before they donated it to the Palisades Interstate Park Commission. (The Commission website features a nice write-up on the history of this spot here: The Cascade: A “Cliff Notes” Story.)
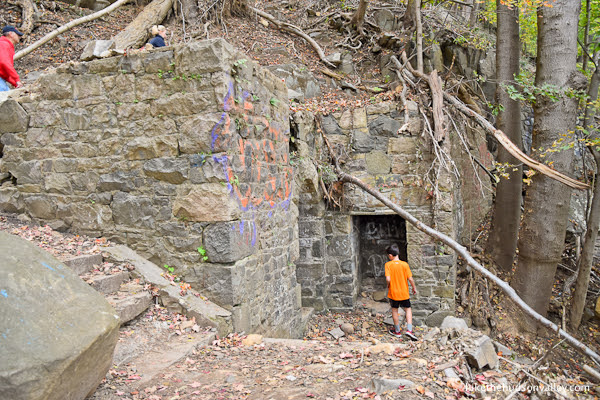
23. The trail ventures around the ruins. Follow the stone wall and hop up a few steps.
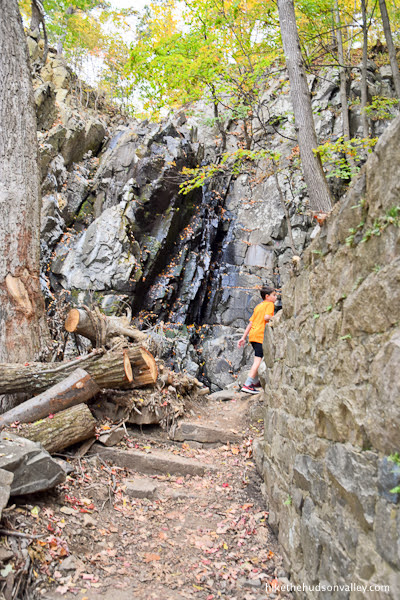
Take one last look at Peanut Leap Cascade (which may or may not be cascading).
We’re going to keep following those white blazes up the hill. Let’s get to it!
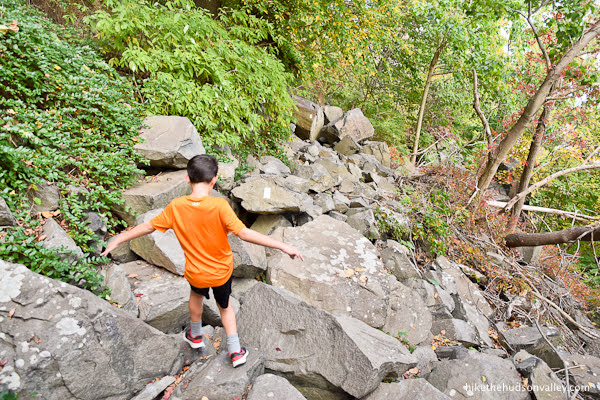
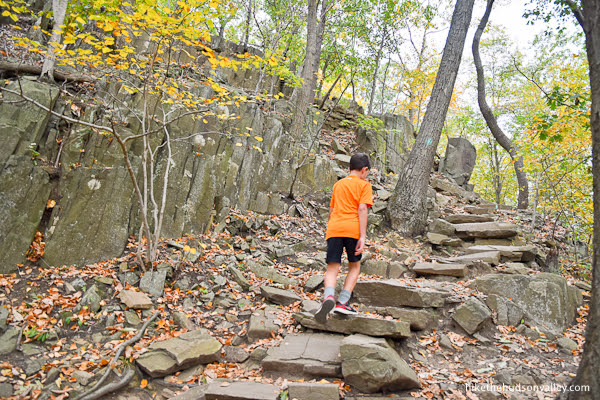
24. Remember all those steps we took downhill, at the beginning of the hike? It’s payback time!
Keep climbing! Over the next mile, you’ll gain over 500 feet in elevation. And don’t worry – there are plenty more rocks, too.
After climbing for about ten minutes, you’ll pass some warning signs giving sage advice to folks heading down the hill.

Immediately thereafter, you’ll arrive at a well-marked junction with the Long Path.
25. Turn left at the junction to hop back on the Long Path (hello again, old friend!), heading toward the State Line Lookout in 1.0 mile.
At this junction, you’ve completed about half of your climb. You’re getting there!
26. Immediately cross a little footbridge (you can see it from the junction). I suspect there’s water going under this bridge when the Peanut Leap Cascade is flowing.
27. Less than five minutes after the bridge, the trail takes a sharp turn to the right, marked by teal blazes on a post (and tree). Careful you don’t stroll straight past this turn! Follow the teal blazes to the right.

What’s that? You want to climb more steps? Boy, are YOU in the right place!
Like, the really, REALLY right place.

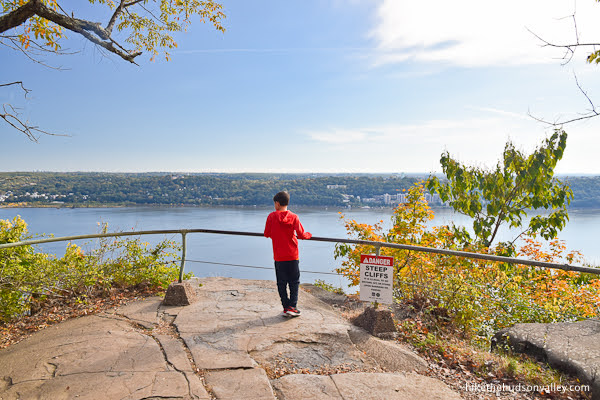
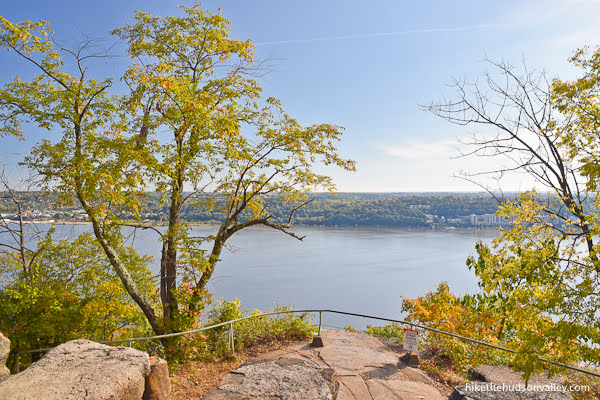
28. Your reward for climbing a million steps? A view! Emerge onto the rocky bluff of High Gutter Point.

Carefully enjoy the view from your clifftop perch, being mindful of the 500-foot doozy of a first step.
29. When you’re done soaking in the view, continue on the Long Path as it climbs – you’re never going to believe this – more steps!
About 7 minutes after High Gutter Point, you’ll arrive at a fork in the trail, marked with the letter “E” for a cross-country skiing trail. Keep left here to keep following the teal-blazed Long Path.

30. The trail becomes wider and flatter (finally!).
Less than ten minutes from the “E” intersection, you’ll emerge onto a paved road.
Turn left onto the road, and you’ll see some familiar territory in just a minute.
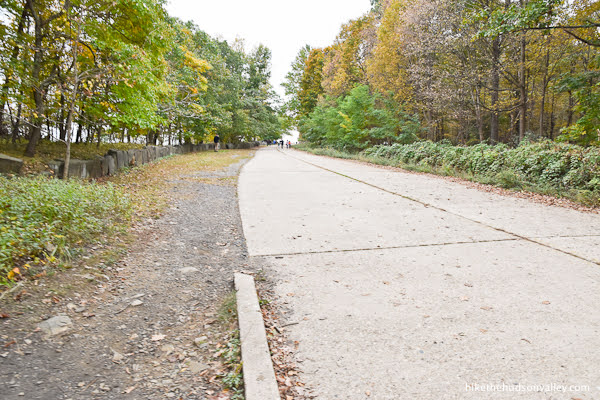

Hello, bird photographers! Hello, café!
You did it! Congratulations! Hope you enjoyed your Giant Stairs hike today. Next order of business: tracking down enough calories to replace all the ones you just spent. Whatever your next meal is, better make it a giant one!
Directions
Directions to the trailhead: The State Line Lookout parking area is about 10 miles south of the Mario Cuomo (née Tappan Zee) Bridge, just off the Palisades Interstate Parkway. The well-marked exit is only accessible from the northbound lanes. If you’re headed south on the Palisades, you’ll just follow the signs to turn briefly northbound, just south of the exit.
Here’s a Google Streetview image of the signage in the southbound lanes, announcing your upcoming left exit and U-turn:
Once you’re headed north on the Palisades, take the well-marked exit for State Line Lookout. Here’s a Google Streetview image of the approach to the exit:
Take the exit and follow it all the way back to the large parking area in front of the State Line Lookout Café.

Note on crowded conditions: We found plenty of parking in the lot at around 9:45am on a pleasant October Sunday. When we got back to the car around 1:00pm, though, we found the lot totally full, with parked cars lining the exit road. None of those cars were ticketed, and it looked like common practice to park there (Please be sure to follow all posted signs and don’t blame me if you get a ticket, but I *think* it’s okay to park along the shoulder of the exit road if you need to. If someone more knowledgeable than me could let us know for sure in the comments below, that would be much appreciated!)
Find a spot, hop out, and let the adventure begin!
GPS coordinates of parking area: 40.98846, -73.90721 (Clicking will open in Google Maps or the Apple Maps app, depending on your browser/device.)
Resources & Interactives
Super-cool Google Earth flyover of hike route:
Google Terrain Map of hike route:
Related resources: If you’re looking for actual facts and/or useful information, visit these resources:
- The official (and very informative) Trails & Hiking page on njpalisades.org
- The very nice (and free!) official Palisades Interstate Park trail map
- Other nice online trail guides for this hike from the NY-NJ Trail Conference, njhiking.com, and scenesfromthetrail.com
- A very nice vlog on the hike that includes some interesting history on the area: Unboring Exploring: Giant Stairs of Palisades Interstate Park, NJ
- An information-packed (and totally not worrisome at all!) article from Columbia Climate School on the 2012 rock slide that created some of the nicest views on this hike: Rock Fall Shakes New Jersey Palisades
Want to support trails in the Hudson Valley? Here’s one great way: Visit the New York-New Jersey Trail Conference homepage and click on Volunteer, Donate, or Shop! (Then you can volunteer, donate, or shop, depending on your mood.)
Thanks for writing this up! I’m in love with this hike and try to get out on my morning off (Wednesday) every week and do it. It helps clear my mind and hits everything I want in an ideal hike. The uncertainty of knowing “what you’re gonna get” by the waterfall is one of my favorite parts. When I went a few weeks ago with microspikes for the first time, I let out a gasp when I finally reached the waterfall! Since the rock slide a few days ago, the Giant Stairs have been closed… I’m eagerly awaiting for it to reopen!
What a great shot, Yehuda! I’m impressed you completed this hike in those conditions – you and your microspikes must have gotten quite a workout! Bummer about the closure, too, but I’m very glad that nobody (yourself included) got hurt. I’ve updated the trail guide above with a warning about the closure — if you hear any other news about a re-opening, please let us know. Many thanks, and happy adventuring out there!
Mike,
I might be jaded because I hike the regular trails here all the time, but I wouldn’t consider the steps a 10 on the difficulty rating. I only say that because it is more or less a linear hike. I would consider other hikes I’ve done like Mt. Beacon (coming from the Breakneck Ridge side), Devils Path at Indian Head and the Wilkerson memorial trail a solid 10 because they involve rock climbing and elevation.
At the palisades, there isn’t really any rock climbing. You don’t have to use your hands to get across. You just have to figure out which rocks to jump across. When you come to the big rock formations where you have a clear view of the Hudson, it could be intimidating, but I wouldn’t say it is difficult.
Efrem, thank you for the feedback! I agree that this is not the same type of difficulty as the other hikes you mention, but I also didn’t want anyone to get surprised by how slow-going (is arduous too strong a word?) it is to pick your way through the boulder field. So I’d call this a 10 for difficulty of terrain, even if it doesn’t have the same calf-busting potential as scaling a proper mountain. And I was bushed after this hike, though it is possible my perspective is skewed because we were hustling to get to my other son’s soccer game. Thank you for sharing your perspective, I’m sure others will find it useful, as I have. (And if there’s a popular consensus that I should knock down the difficulty rating, please let me know, folks!)
Just hiked the trail (06/04/2024), and this was very helpful guide. Going counterclockwise offers a much more rewarding experience as opposed to the Alltrails version that suggests a clockwise approach. The views were great, and I would definitely say it was a good challenge for those who are inexperienced. The swing in the picture is no longer there but the rope still remains if you want to tarzan swing. Additionally, I would suggest physically paying the parking meter as opposed to the app because I got a ticket 30 minutes after parking even though the first hour should be free. I paid for the parking after I knew 1 hour had passed.
Thanks for the parking tip. Do you need quarters to pay for the parking meter if not using the app?
Hi, Mandy! The meters don’t take cash — you can use a credit/debit card, or you can pay via the app. You can see the “Parking Fees” section on this page for more info: https://www.njpalisades.org/trails.html
Hope that helps – happy adventuring!
My wife and I hiked the loop 11/9/23. Great exercise. Great views. Great weather. Great article – thx.
Aside. The Boulder Field has lots of large uneven surfaces and lots of crevices and it is a sprained ankle waiting to happen. I wrapped both ankles w ace bandages and tightened up the hiking boot laces. Glad I did.
Thank you for the kind words and great advice, Steve! Yes, that scramble is perhaps the sprainiest stretch of trail in the Hudson Valley. Tightening up the laces is definitely a solid idea. Glad you and your wife had a great day out there!
Is there a way to pay for parking with out a smart phone?
Hi, Rivka! You can find details on Palisades parking costs here: https://www.njpalisades.org/parking/. On that page, it says, “Note: First hour is free at State Line, but all drivers must enter their license plate number into the metered parking system via pay station or app upon arrival.”
So it sounds like you can pay at the pay station, no need for a smart phone. Hope that helps!
Cheapskate alert! It’s metered parking. $1.5/hr weekdays; $2.50/hr weekends.
Thank you so much for the helpful (and properly labeled as a Cheapskate Alert!) update and photo, Cheuk! I’ve added a Cheapskate Alert to the top of this page. Very much appreciated!
This is the most detailed guide I saw. Do you know if there is an alternative entry point that is closer to the giant stairs portion and whether it is feasible to just hike the giant stairs portion and make a smaller loop or come back the same way.
There isn’t an alternative shorter way. You can get to the stairs from the right or left of the state line lookout/main parking lot/cafe. Either way, you have to make a descent from that area to the shoreline. This guide takes the path going right towards the Women’s monument. After you get down to the shore line, it’s about a 5-10 minute walk to the steps.
If you decide to take the left route which goes towards peanut leap falls trail, it’s probably 15 to 20 minutes to reach the steps after you get to the shore line. The actual descent is likely a bit longer. I think most people prefer this route because I usually see more people coming towards me on the steps, but this route takes longer to reach the steps. It’s probably faster to do a loop. If not, you would have to do the steps twice. It’s 2 hrs. on the steps, but I did it in 43 minutes.
You could park at the meter on the road which is right across from the start point of the WM trail. That will cut your hike to the steps by about 3-5 minutes.
I have to correct myself. Mike took the longer path thru the forest to get to the Shoreline/women’s memorial trail. You can just take the two way road. It might save you 10 minutes. From the main parking lot, you’re walking back towards the Palisades on the two way road to the parking meter. It’s in pic #6, but the meters were not there yet.
Again, you can park at the meter. The trail head is right across the road where you see the grey car.
Thanks so much for your helpful replies, Efrem! And thank you for the nice words, Ying – I hope you have a great time whenever you get out there!
Thank you
Mike, your instructions were excellent! Thank you so much for the great website and updated info.
I hiked this on 4/9/2023. This was one of the best and most challenging hikes I’ve done (and I have done a lot!) in the Hudson Valley . The views and scrambling were fantastic and even though distance-wise wasn’t very long, it was a great work out. 71 flights of steps according to Apple’s Health App!
Thanks so much for the kind words on this site and the nice thoughts on this hike, Jeff — all very much appreciated! Glad you had a great hike out there.
Mike,
I have to thank you and apologize. I skimmed through your pics and got “lost”. Instead of turning left at the A trail intersection leading to the crossroad where you see the sign for the women’s monument, forest trail and Giant steps, I made a right on the C trail which is close to the A intersection. That trail goes deeper into the forest opposite the palisades highway and loops back to the parking lot. It also puts you on the E trail intersection, which also leads to the Giant stairs from the opposite direction, but I didn’t know that at the time. So, I got back on the trail from the parking lot and found myself bouncing back and forth between A and B like a ping pong ball.
Finally, I actually read through your directions and realized my error. When I reached the bottom of the descent, I decided to walk a bit through the forest along the shore line. I got as far as the Glenwood station in Yonkers, then turned back towards the stairs. I started the steps at 12:11 pm and reached the parking lot around 2:20 PM, so I definitely did the Giant steps in under 2 hours and my knees are paying the price now.
I enjoyed this hike. It’s under an hour drive from Bklyn if you leave early. Next time I’m going to do the C trail and continue on the E trail to the Giant steps from the opposite direction.
I hope you had a Fitbit on, Efrem – you must have logged a zillion steps that day! Thanks so much for the trip report and kind feedback, and I’m glad to hear that the trail guide above didn’t lead you astray (though I can take some of the blame for encouraging skimming with the wordy descriptions). Glad you ended up enjoying the hike even with all the extra strolling!
HI Mike,
I am planning on visiting the Giant Stairs. I am sure IF it becomes toohard I can tun back right?
Would you recommend getting to at least “The Money” spot?
Thanks
Bernadette
Hello, Bernadette! Great question! In my opinion, by the time you got to the money spot, you’d be so deep into the loop that you’d be better off just continuing on, even if you wanted to quit. The good news, though, is that the scramble is pretty uniform throughout, so no matter which way you do the loop, you’ll have a pretty good idea early on whether you’re up for doing a mile of it. After you scramble over your first hundred yards of boulders, you can think, “Would I enjoy doing this for another 90 minutes or so?” If the answer is no, you can backtrack from there and still enjoy the wonderful views from the parking lot. And you’d still get to experience all those wonderful normal-sized stairs on your way back up, too 🙂 Hope that helps, and hope you have a great hike here when you visit!
What a hike! Did this today and really enjoyed the challenge. As usual Mike’s directions and tips spot on! Thanks Mike for turning me on to this one. A beast!
Glad you had a great day and enjoyed the challenge, George! Really appreciate the kind words, too – thank you!
Thank you for this detailed trail guide. My friend and I did it yesterday. It was challenging and beautiful. We heeded your advice and left the dogs at home. As bought several bottles of water and snack. Having the detailed descriptions and pictures made it so much easier. Thank you
That’s awesome, Spring! So glad to hear it! Hope you were glad to have left the pooches at home for this one – I know that’s a tough decision to make. Glad this guide was useful to you, and thanks for the kind words!
This looks great. Is there any way to cut down the distance? Since there are signs facing hikers in both directions, is it possible to do the scramble part and then turn back? (Avoid the stairs?) Or do 1/2 the scramble and then turn back?
(I know on breakneck I’d never go *down* the rock face, and always need to complete the loop, but what about on this one?)
No way to avoid stair are on both side of hike
Hi, Jerome! I’m afraid Doug is right – there’s just no way to avoid the steps. You start at the highest altitude of the hike, right at the parking lot. Whether you do this loop clockwise or counterclockwise, you’ll have a steep climb to get from the river’s edge (and Giant Stairs) back up to the parking lot. That’s one of the reasons I gave this hike a 10/10 difficulty rating, so people wouldn’t underestimate the scramble at Giant Stairs, and also the steep climb required to complete the loop afterwards. It’s a tough one, but rewarding. Hope you enjoy the hike if you decide to tackle it!
Did this hike today and it was amazing! Fun and challenging. The trail guide was easy to follow and the trail was well marked. Loved that there were clean bathrooms at the trailhead and ample parking. The waterfall was a great treat! Would highly recommend!
Glad you had a great hike out there, Brittany! Thanks for taking the time to share all of that nice feedback.
Great workout hike with lot of stair too
Indeed it is! We did see one guy jogging around the loop (not at the scramble part – I assume he slowed down there), and he passed us twice. Was that you? 🙂 Doing this loop once in a day is exhausting, I’m impressed anyone tackles it multiple times.
Not me
Heads up – those current coordinates as of 3/17/2022 take you to breakneck ridge!
Thank you so much for the catch, Nicole! That’s always the last thing I update when I make a new trail guide, and I forgot to do it before putting this one online. It’s fixed now! Sorry for the error, and thanks for being such a good beta tester! 🙂