Background
If you find this free trail guide useful, please provide payment by picking up at least one piece of litter on your hike. Cha-ching! Thanks for being awesome! (And here’s a quick primer on Leave No Trace, too, to help us keep the trails nice and fresh for each other.)
Background you can feel free to skip: A visit to Kaaterskill Falls used to encompass my least favorite section of “trail” in the Hudson Valley: the walk along the busy, shoulderless stretch of Route 23A to get from the parking area to the trailhead.
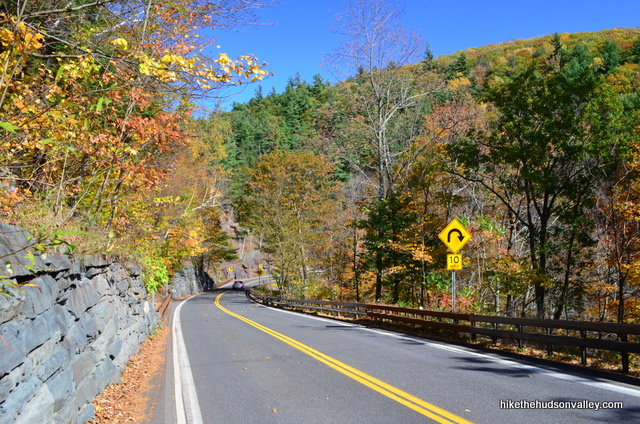
“Well, I’m glad we’re all still alive,” we’d say as we reached the kiosk at the start of the actual trail, just off the road, as cars buzzed around the bend behind us.
That real-life game of Frogger (kids: ask your parents) used to be the only way to access the bottom of Kaaterskill Falls. Not anymore! In 2016, the NY DEC completed safety enhancements and other trail improvements at Kaaterskill Falls. Now, you can access all of the awesomeness at Kaaterskill Falls from the upper trailhead via some excellent new trails, including enough new steps to give the place an Incan vibe.
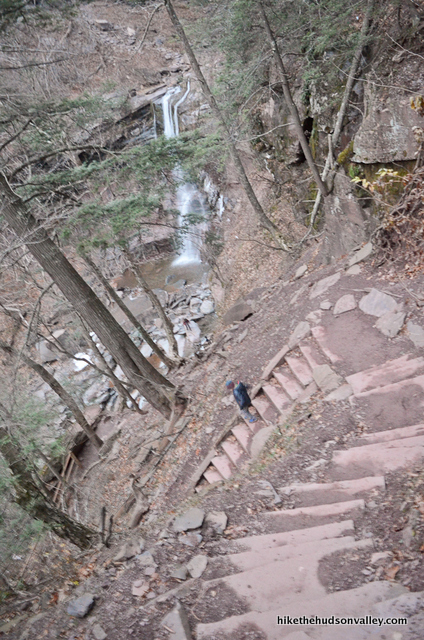
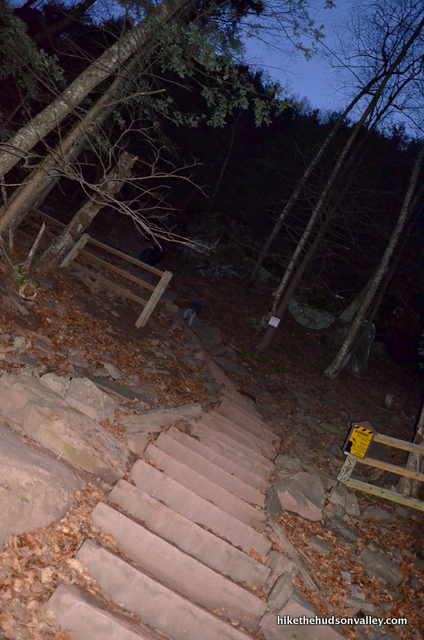
While I’ve seen some grumbling online about the changes here taking away from the natural beauty of the area, I found the opposite to be true – finally, we have proper trails that allow you to access all the beauty here without being tempted to tromp your own (potentially deadly, and definitely damaging) path. Now the trails don’t maddeningly end right at the bottom of the falls – like your favorite credit card, these new trails are everywhere you want to be. The new viewing platform gives you a breathtaking vantage point of the upper falls, too.
Best of all, the whole shebang can be accessed from the (also enhanced) upper parking area, making that trek along the road totally unnecessary (though it is still an option, if you prefer that route). Now you can start at the top, see all the sweetness up there, and then make your way down to the equally awesome view from the bottom. What’s not to like about that?
Several words of caution: My first Kaaterskill trail guide spent several paragraphs warning hikers not to wander off-trail here, due to the many deaths and injuries that regularly occurred (and still occur) at Kaaterskill Falls. That warning is still tragically relevant. Even after the improved signage and safety fencing was installed, several people have gotten killed or hurt here.
See these tragic headlines that occurred after the initial safety improvements (more fencing and signage were added in late 2017):
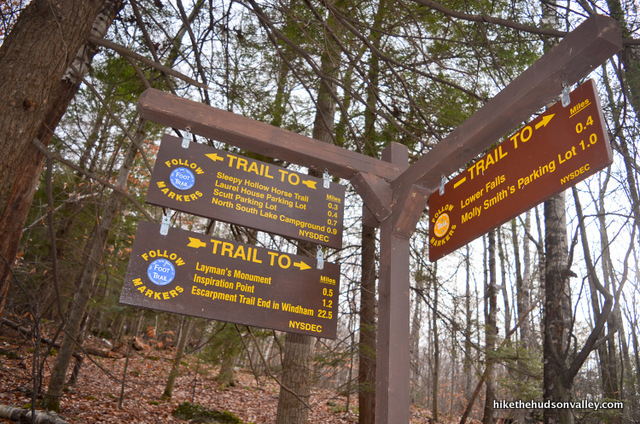
- 2016: Newburgh hiker falls to death at Kaaterskill Falls in Greene County
- 2016: New Jersey teen falls to his death at Kaaterskill Falls in Greene County
- 2017: Woman Falls, Suffers Head Injury at Kaaterskill Falls
- 2017: Two Hurt in Separate Incidents at Kaaterskill Falls
I do not know the individual circumstances in all of these incidents, but when you read many of these stories, a common thread emerges: almost all (maybe exactly all?) of the tragedies at Kaaterskill Falls begin with someone leaving the trail and/or ignoring fencing and warning signs.
The safety features here do NOT protect you if you choose to wander off-trail. If you wander off-trail, you are endangering your own life, the lives of those in your party, and the lives of the people who may have to try to rescue you. Please don’t do it.
If you stay on the marked trails, there is no greater danger here than you’ll find on your average staircase. Once you wander off-trail, though, all bets are off. Please stay on the trail. When I read about you in the paper, let it be because you won the Nobel Prize, not because you visited Kaaterskill Falls.
So we’re agreed, then? We’ll all be sticking to the trails and not making any headlines out there? Excellent!
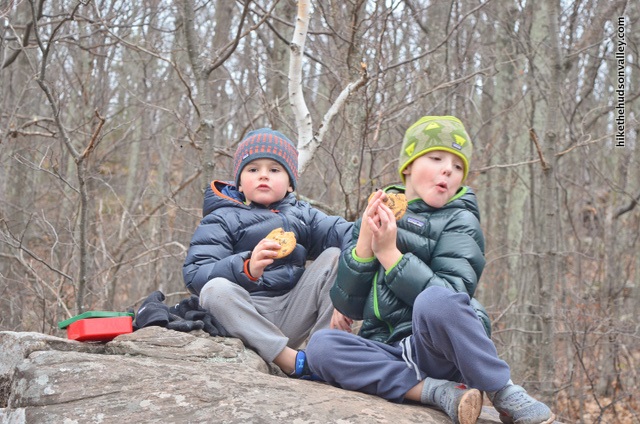
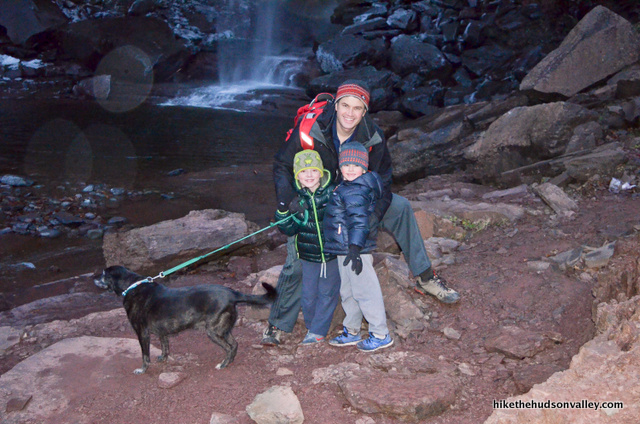
I brought my kids (aged 5 and 8) here in December 2017, on a cloudy, 40-degree day. The conditions weren’t ideal, but the kids didn’t seem to notice. They loved everything about this hike, insisting that we do the entire 4.7-mile Full Monty version out to Inspiration Point, smashing my five-year-old’s previous longest-hike record by about 100%. (The cookie and Cheez-It bribes probably didn’t hurt, either.)

The improvements here have made this hike so much better, and the money spots so much more accessible. While my first Kaaterskill trail guide is still perfectly valid, the construction around the upper trailhead at Kaaterskill Falls have made that old route, in my opinion, totally obsolete.
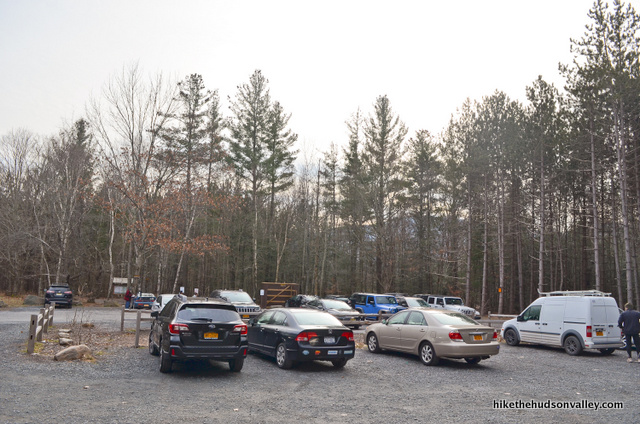
One more note of caution: Kaaterskill Falls is not a well-kept secret. I was here on a junky December Saturday, and the parking lot was almost full (and the street leading into the parking lot is lined with more “No Parking” signs than trees). I can only imagine how crowded it must be on a beautiful weekend – that parking lot must fill up early and stayed filled up. I highly recommend you hit this hike at an off-time, if possible – weekdays or very early on weekends.
Whenever you visit Kaaterskill Falls, you should definitely make it a priority to get out here. An awesome Hudson Valley location has somehow managed to become even more awesome. No real-life “Frogger” skills required.
Note of caution on wheelchair accessibility: While I have tagged this hike with “wheelchair accessibility” in the highlights section of this trail guide, that doesn’t tell the whole story. The section of trail that is officially accessible (from the Laurel House Road parking lot to the viewing platform) is made of crushed stone, with over 100 feet in elevation change down to the platform. Attempting this trail section with a standard wheelchair would be quite difficult, bordering on impossible for some. Please see MG’s comment below for further details on the harrowing experience with bringing their mother here in a transport wheelchair, and requiring help from strangers to get her safely back to the parking lot (without ever seeing the falls). This trail was created with accessibility in mind (“…in the fall of 2015, the DEC completed a fully accessible trail leading to a new accessible overlook platform at the top of the falls”), but please keep the trail surface and elevation changes in mind as you’re planning your trip here. I hope this update will help others to avoid a similar to experience to MG’s mom. (If there is further information that would be helpful to adventurers in wheelchairs who would like to visit this spot, please share it in the comments and I’ll update this section accordingly. Thanks!)
Trail Guide
Bonus unsolicited advice: Don't depend on having cell service in the woods - it can be spotty out there! Download this trail guide to your phone before you head out. (It's easy to do on iPhone and Android.) May your connection to nature be strong, even when your connection to the internet is weak.
1. From the parking lot on Laurel House Road (see “Directions to the trailhead” below), follow the wide gravel path to the kiosk with educational signage posted. Might as well learn something while we’re here.
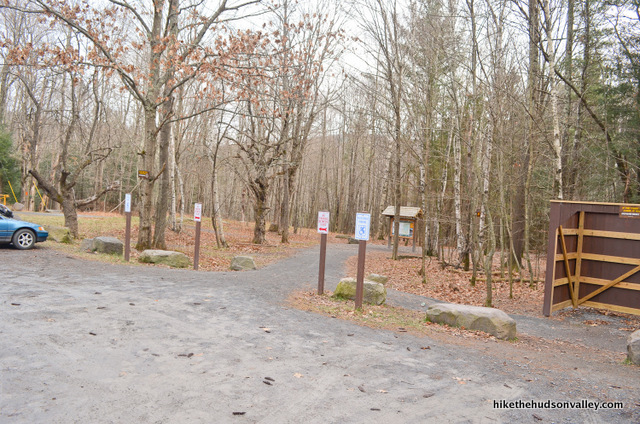
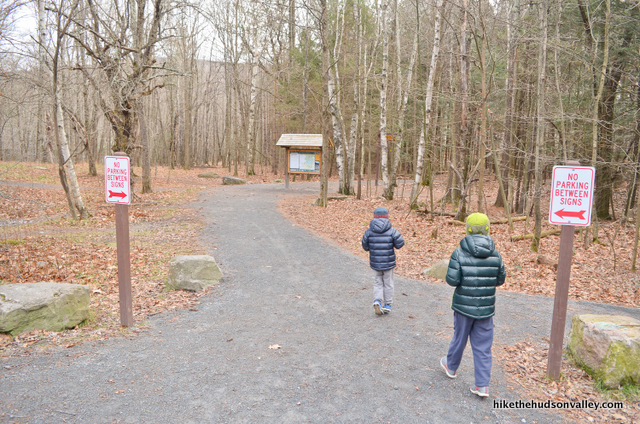
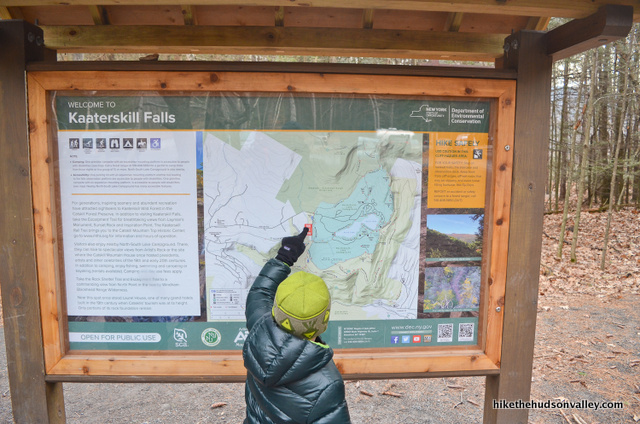
2. When you’re done educating yourself, proceed past the kiosk. In just a moment, at a well-marked fork, take the Yellow Trail to the left.
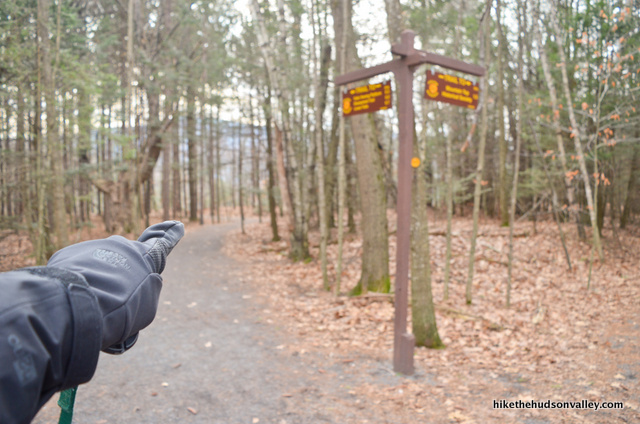
3. Enjoy the meandering path as it slopes gently downhill.
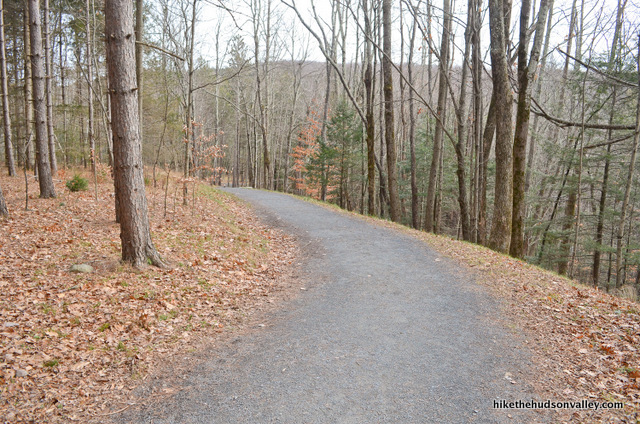
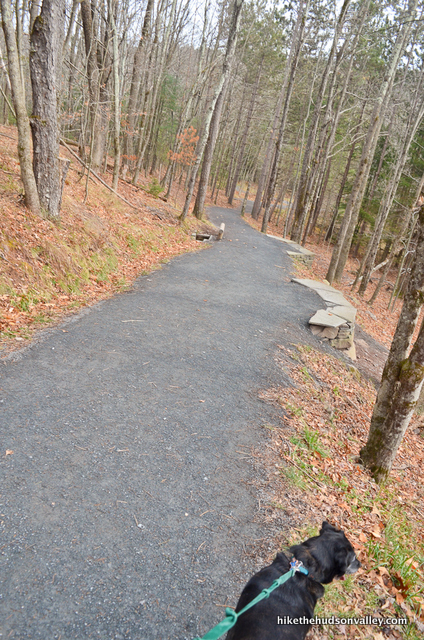
In less than five minutes, you’ll arrive at a well-marked fork where the Blue Trail splits off to the left (don’t go that way – yet). We’ll come back here soon, but for the moment, turn right to follow the Yellow Trail toward the viewing platform (took us about three minutes to get to the platform from here, heading straight and ignoring unmarked side trails).
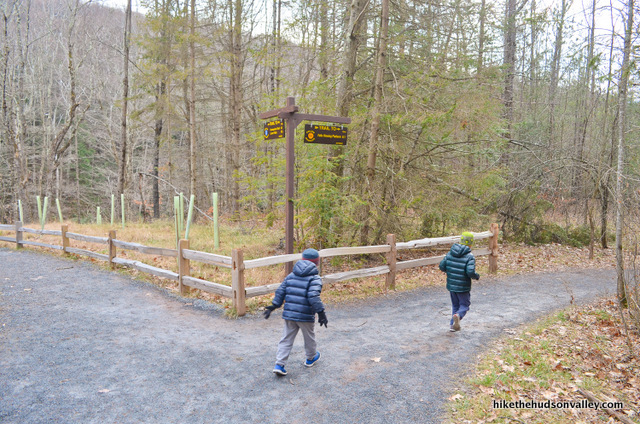
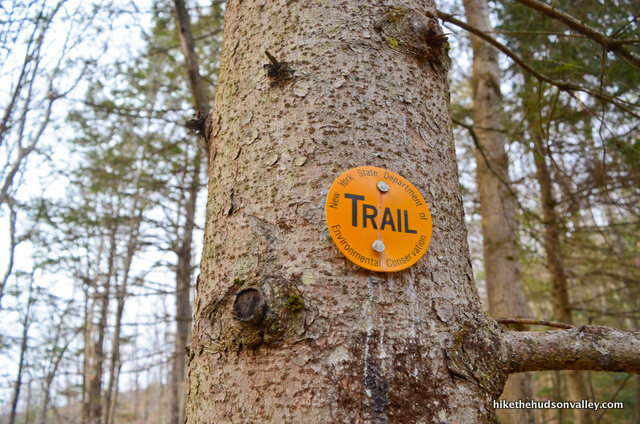
4. The wide gravel trail continues sloping gently downhill. You may start to hear the falls through the trees.
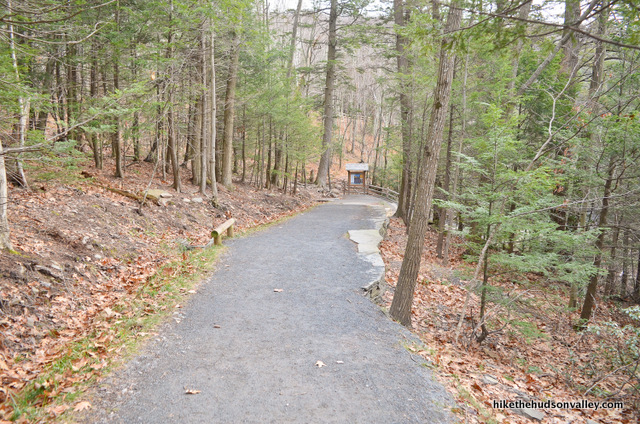
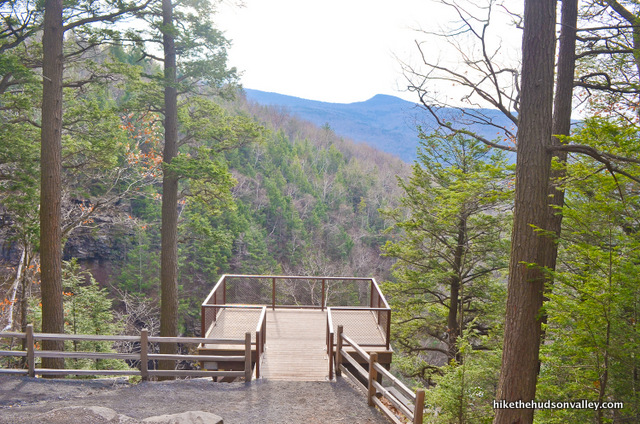
And in just a couple minutes, boom! Here you are. What an awesome spot.
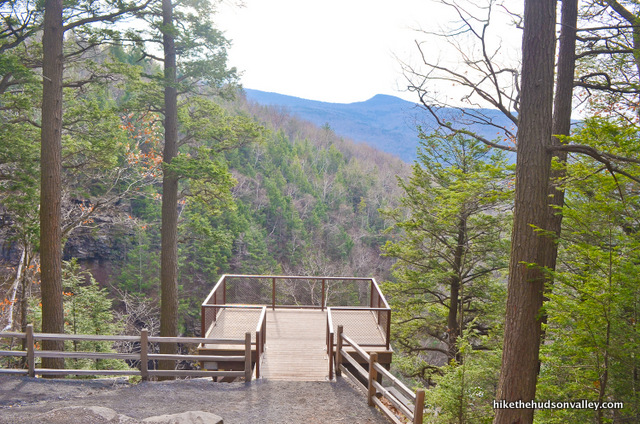
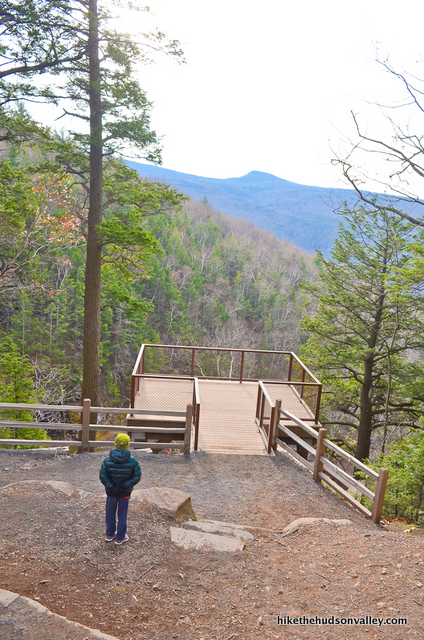
“You go first, Daddy,” my sons said.
“Why?” I asked.
“In case it falls down,” they replied. It’s good to feel loved.
Once I got out there, they said, “Now jump up and down, Daddy!”
I never should have told my kids about that life insurance policy.
But in all seriousness: Duuuude. What a great view. Prior to this platform being here, you couldn’t get a vantage point like this. And to get anything like it at all, you had to risk life and limb. No more. How cool is this spot? (Also, the platform doesn’t fall down if you jump up and down on it – you can thank my kids for that research.)
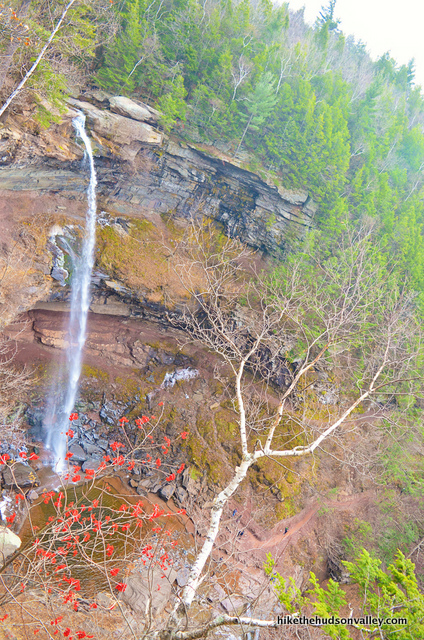
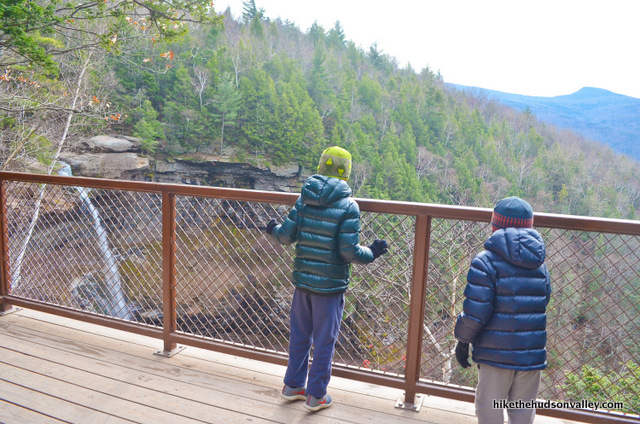
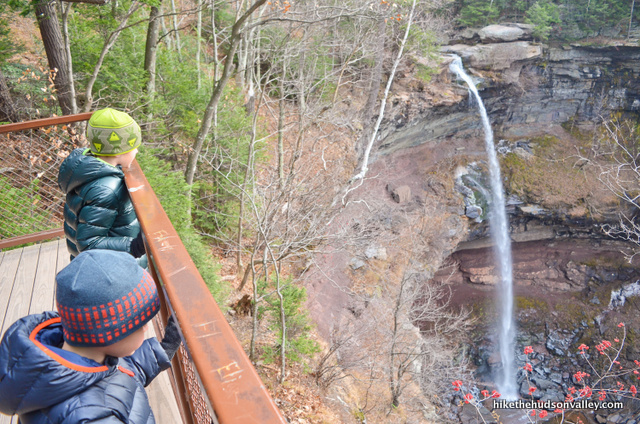
5. When you’re done ogling the view, return to the Yellow/Blue junction, just up the hill.
Safety note: Along the way back to that junction, you may notice a wide, unmarked trail splitting off to your right. Now that you’ve visited the platform, you might even be tempted to check out whatever’s down there.
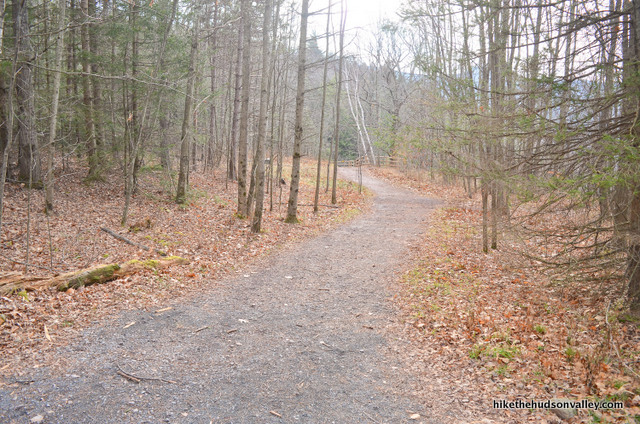
The answer is that there’s nothing to see down there, except fencing and warning signs. I wasted five minutes checking it out so you wouldn’t have to. Really, nothing to see here.
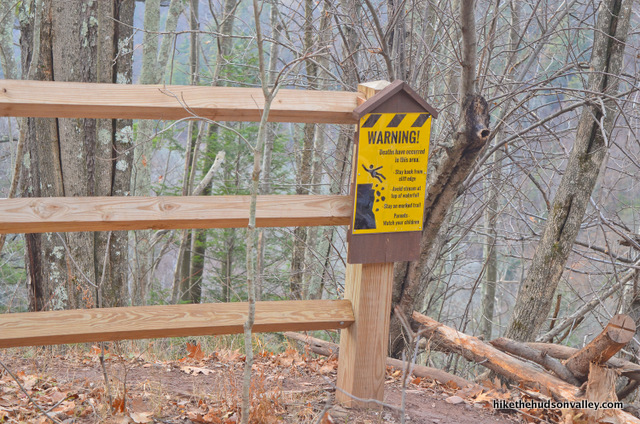
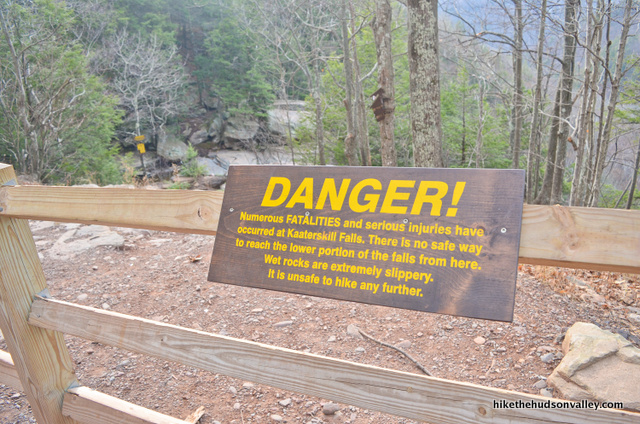
Of course, you can see a well-worn footpath going right around those warning signs. And people hanging out beyond the fencing, too. Sigh.
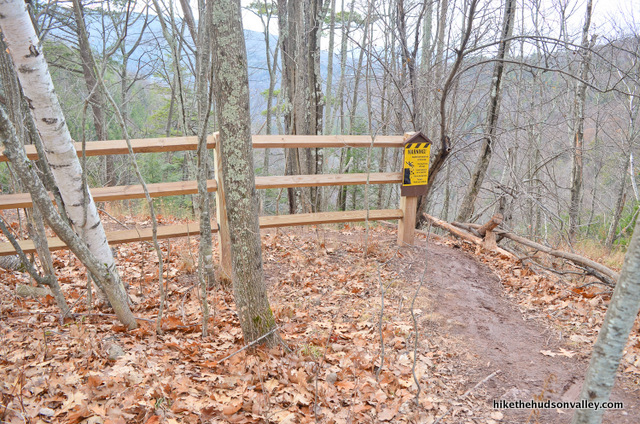
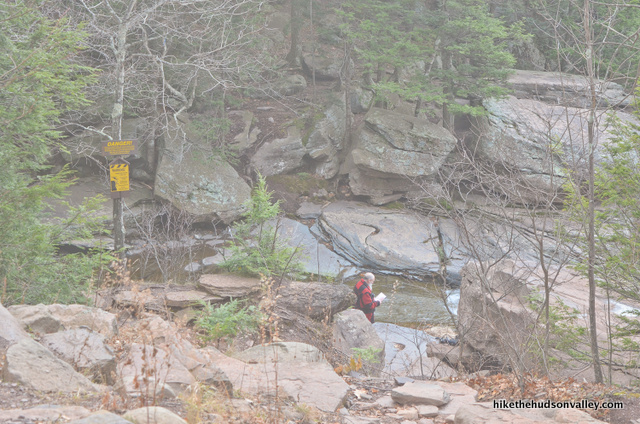
If you’re going to die today, this is most likely how it will start: By ignoring warning signs and circumventing fencing. Please, PLEASE, don’t do that. The best views at Kaaterskill Falls are now, thankfully, accessible via proper, well-marked trails. No need to go rogue and put yourself (and others) in danger.
6. Now that you’re back at the Yellow/Blue intersection, it’s choose your own adventure time!
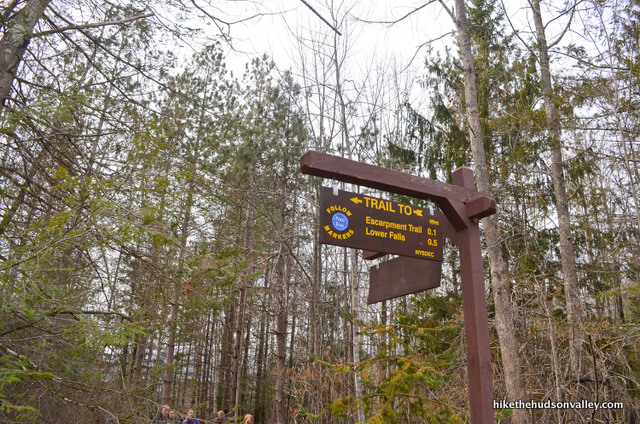
If you just came here to check out the platform and now you want to go home, simply turn left (assuming you’re coming up the hill from the platform) and retrace your steps back to your car. Hope you had fun! Enjoy not reading any more of this trail guide, you lucky duck!
If you’re going to venture to the bottom of the falls, or to Inspiration Point (or both!), you’ll need to turn right to hop on the Blue Trail and cross that awesome bridge right there. You’ll probably want to stop and check things out. And maybe play a very quick game of Poohsticks?
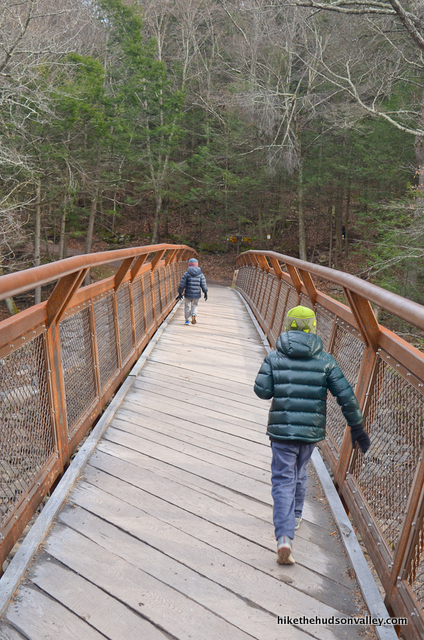
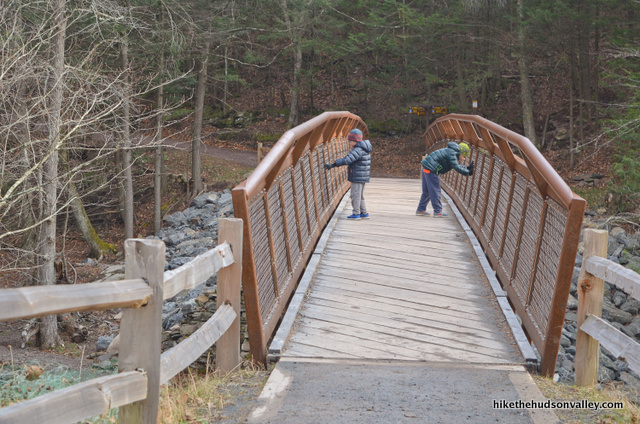 7. Immediately after crossing the bridge, you’ll arrive at another well-marked junction.
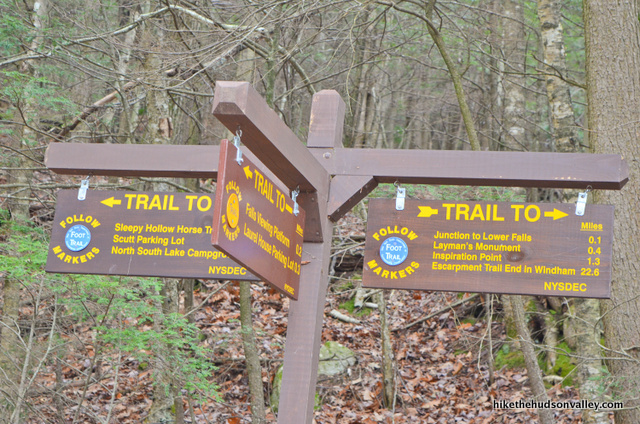
Turn right to hop up the embankment and follow the Blue Trail toward Lower Falls, Layman’s Monument, and Inspiration Point.

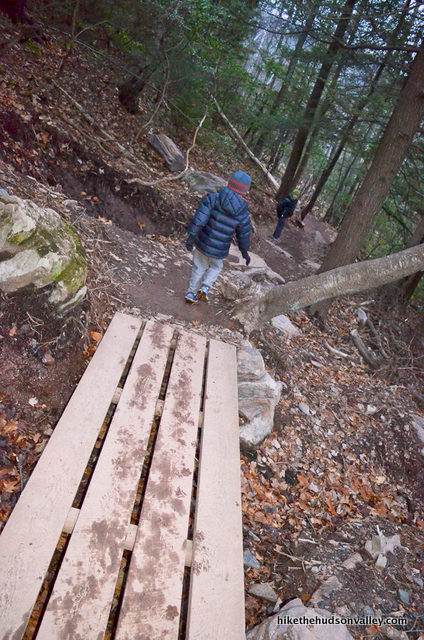
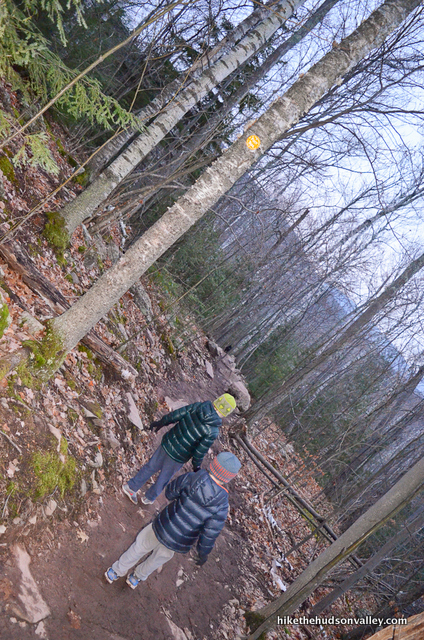
8. No more wide gravel paths for you! The trail turns into a proper, bumpy affair (the way nature intended) in this stretch.
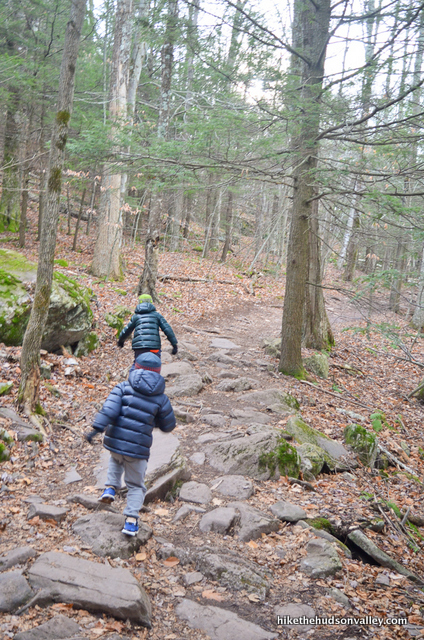
From the bridge, it’s .16 miles (took us less than five minutes) to your next decision point: the trail junction that lets you choose between the lower falls and Inspiration Point. See you there in a few!
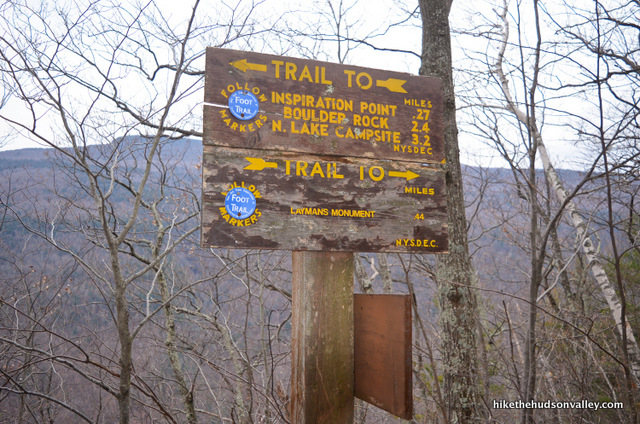
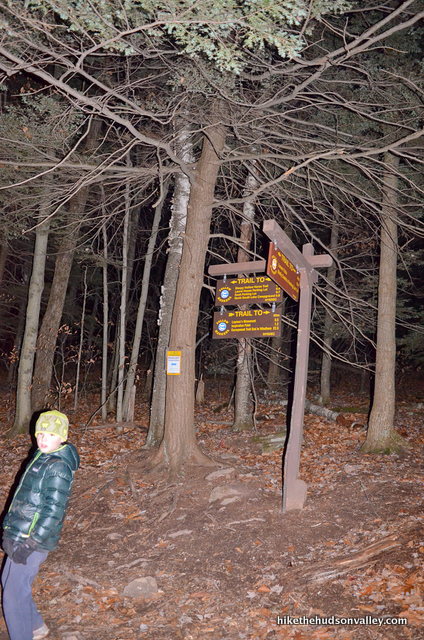
9. At the signpost where the Yellow Trail heads downhill to your right and the Blue Trail motors on straight ahead, it’s choose your own adventure time again!
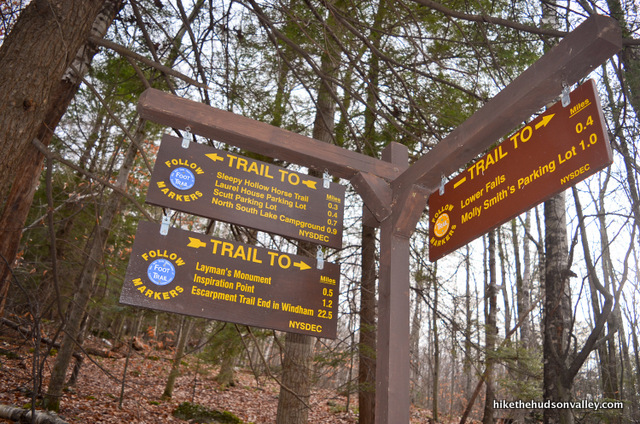
Yellow Trail to lower Kaaterskill Falls: 1.08 miles roundtrip back to this spot, approx. 374 ft. vertical ascent (starting with a big fat descent). (The estimate on the sign suggests .8 miles roundtrip, but that estimate does not include chasing after my kids at the bottom.) Took us about 45 minutes to get back to this spot (though we were hustling more than usual, on account of the sun going down).
Blue Trail to Inspiration Point: 2.3 miles roundtrip back to this spot, approx.. 641 ft. vertical ascent (mostly rolling hills with a few steep spots). Took us about two hours and fifteen minutes to get back to this spot, allowing plenty of time to stop for ogling views and/or consuming Cheez-Its.
If you have enough gas in the tank, they are both awesome places. I recommend doing them both, whether it’s today or on your next visit. We did Inspiration Point first, then the lower falls, so that’s how I’ll write it up below.
If you’re skipping Inspiration Point, then hop on down to Step 18 below. Otherwise, see you at the next step!
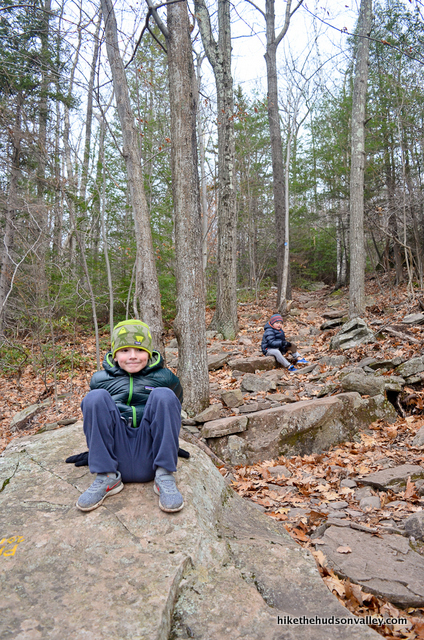
10. Next stop, Inspiration Point! Let’s do this thing. Keep left/straight at the junction to continue on the Blue Trail. Be sure to stop to check out the cool rocks along the way. And feel free to just sit down in the middle of the trail if you get tired.
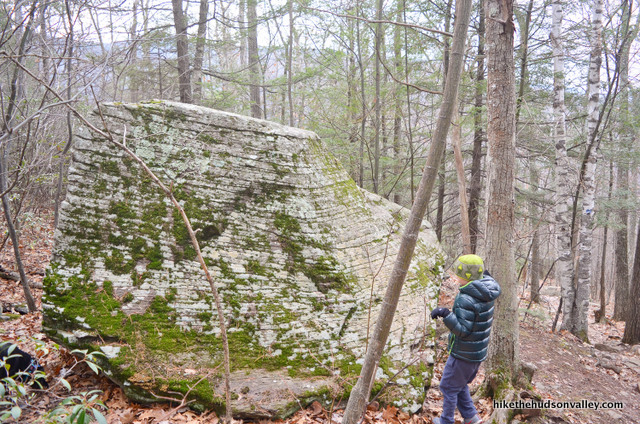
Your next landmark is Layman’s Monument. (It took us just under 20 minutes to get there, going at sometimes-crawling little-kid pace.)
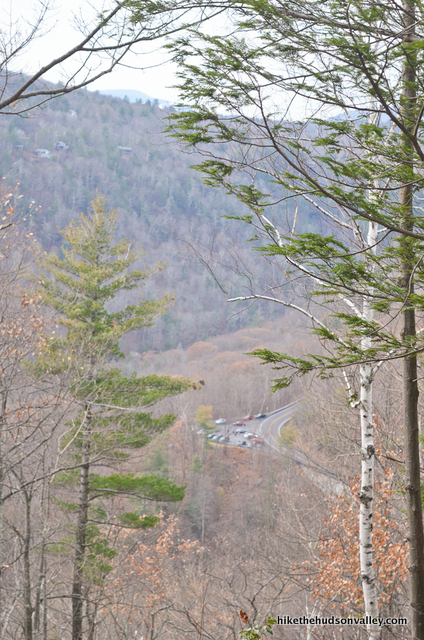
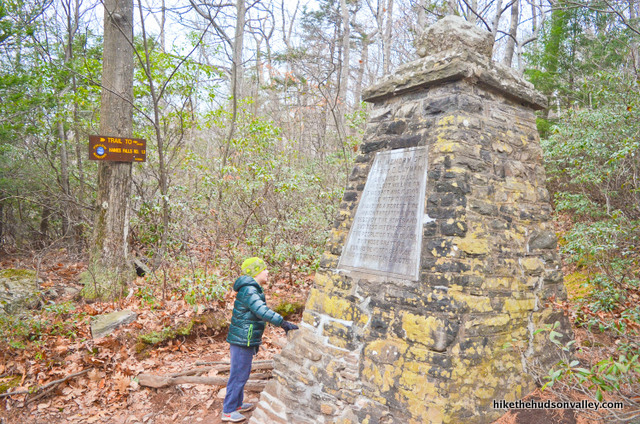
11. As you approach Layman’s Monument from behind, take a look off to your right to see the parking lot for the lower trailhead of Kaaterskill Falls through the trees.
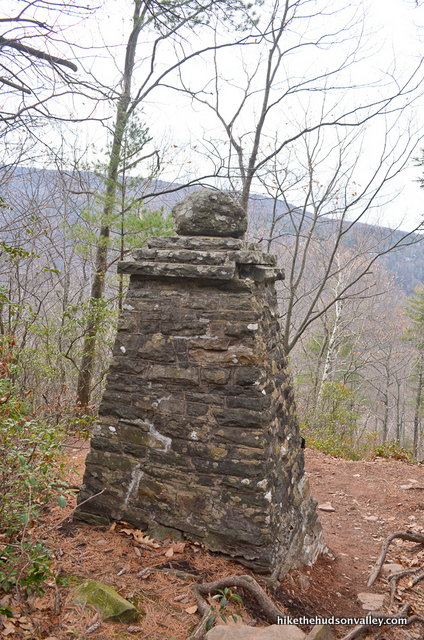
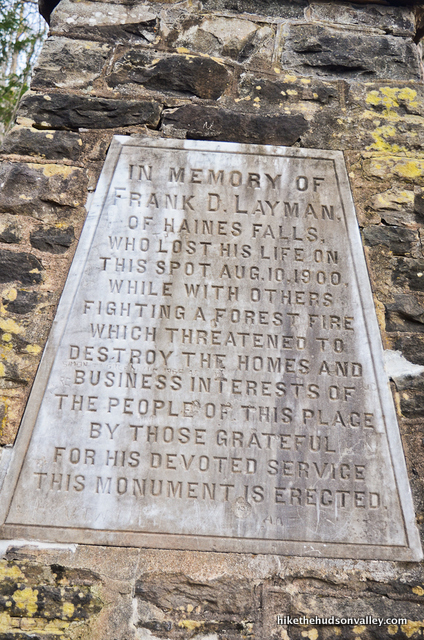
Take a moment to read the inscription in memory of Frank Layman, who gave his life fighting a fire at this spot in 1900.
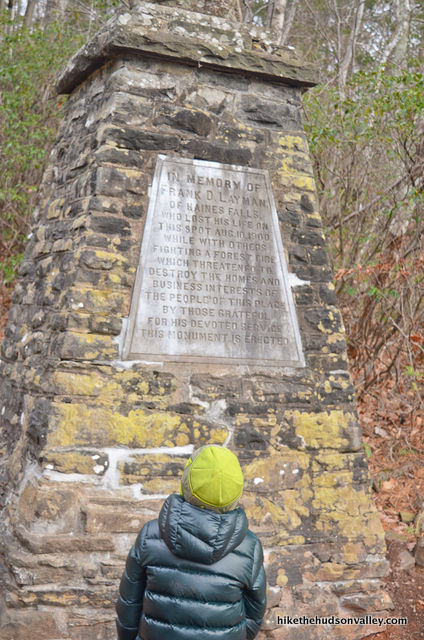
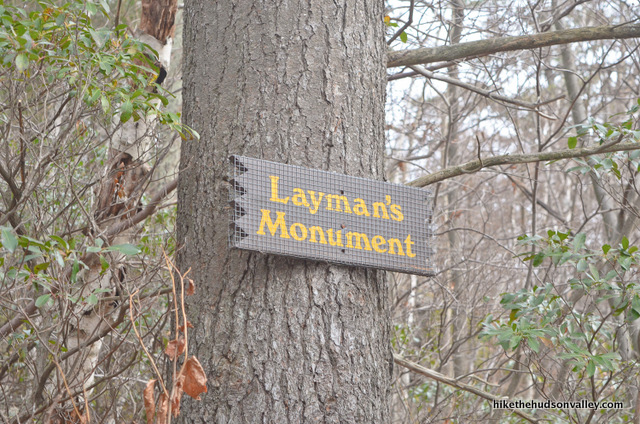
The trail wraps around the monument and heads to the right (assuming you’re looking straight at the inscription). Just keep following those blue blazes.
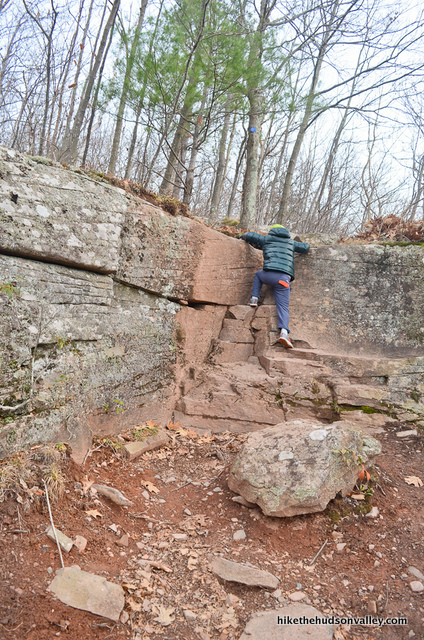
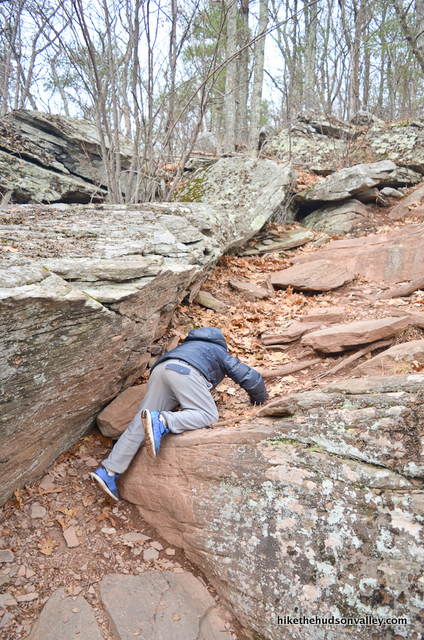
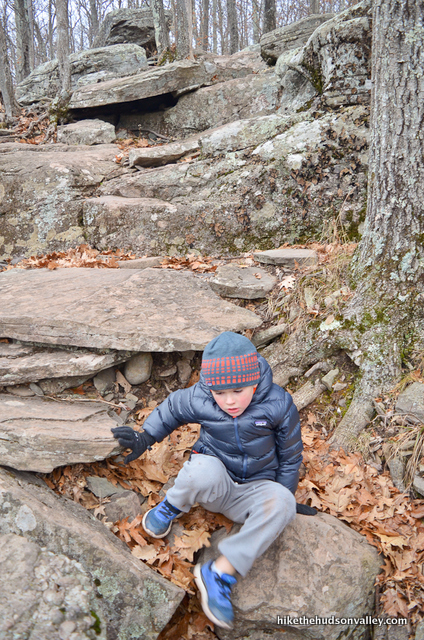
12. Five minutes past the monument, you’ll arrive at the steepest spot on this hike, where you’ll need your hands to clamber up and over. (It also apparently helps if you yell, “Don’t help me, Daddy!” while you negotiate this trail feature.)
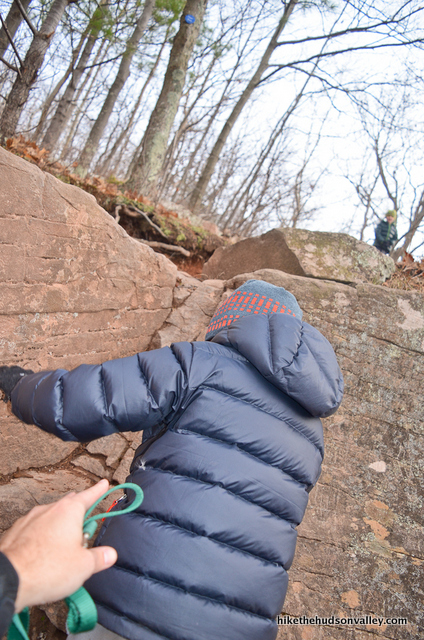
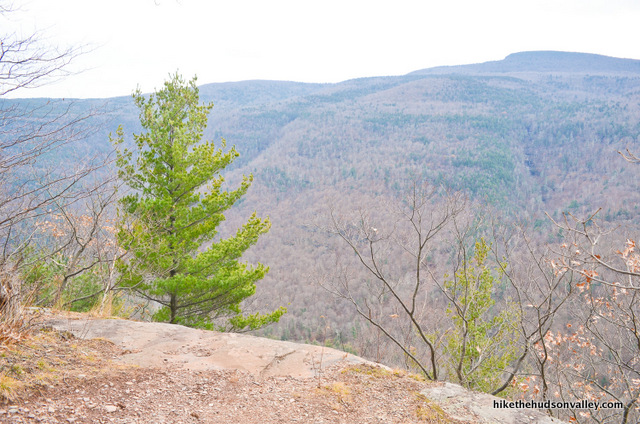
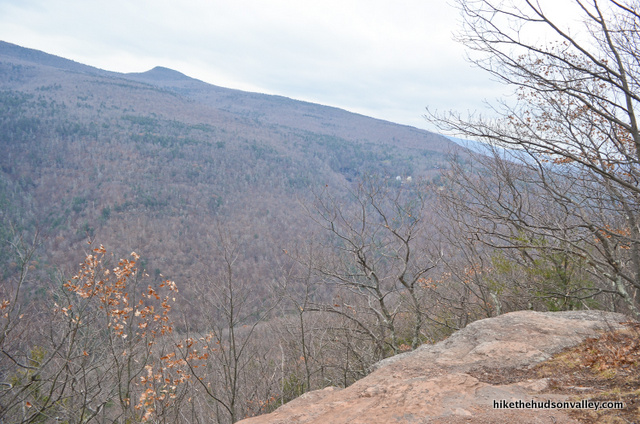
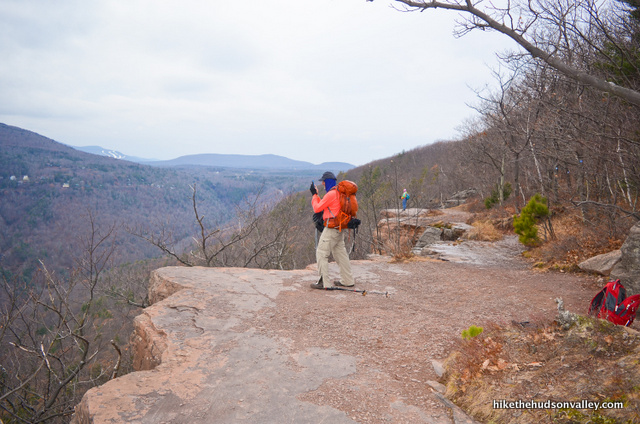
13. Immediately after that steep climb, blammo! Your first clifftop view of Kaaterskill Clove. Off to the right, you can see the ski slopes at Hunter Mountain peeking (and peaking?) over the horizon.
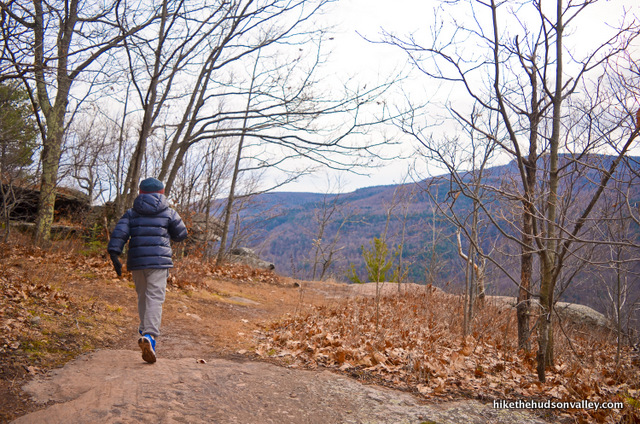
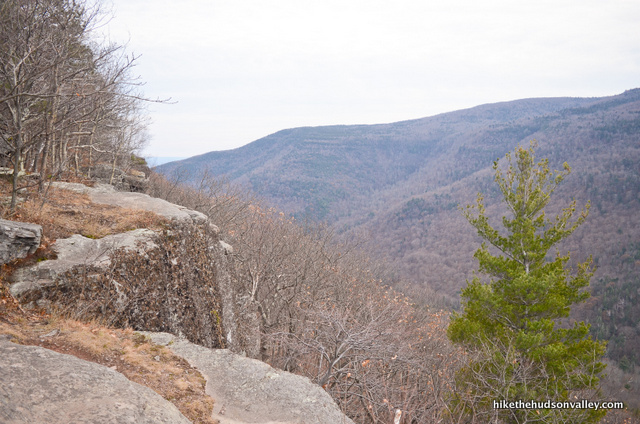
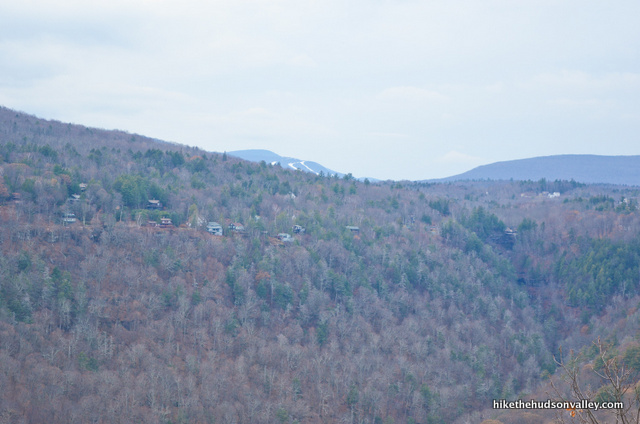
This view is the first of many along this stretch of trail. Each has its own unique charms, but the vantage point doesn’t wildly change (the view from Inspiration Point is awesome, but it’s similar to this one – just wanted to get your expectations in check, in case you’re picturing a sweeping view of the entire Hudson Valley).
14. The trail offers many more interesting spots to explore in the next section.
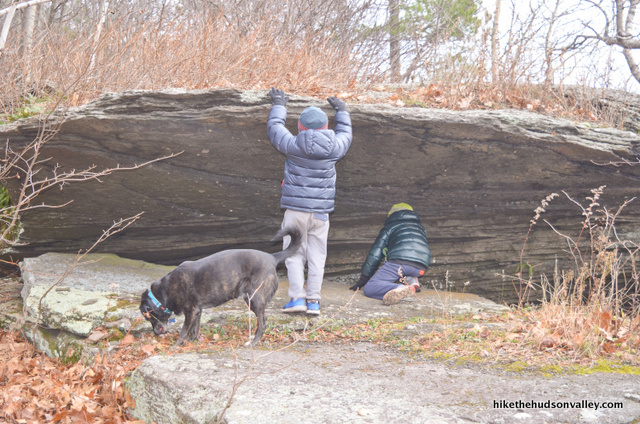
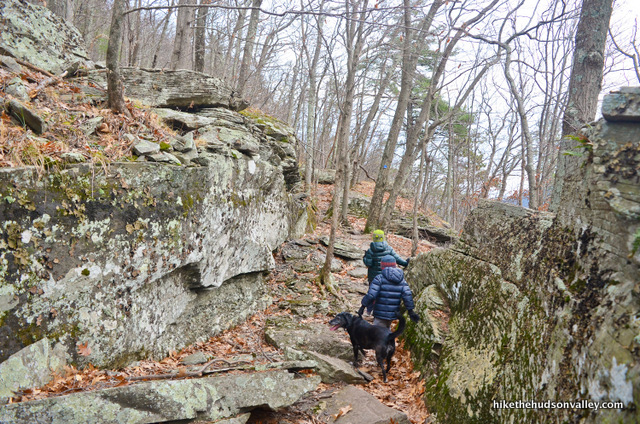
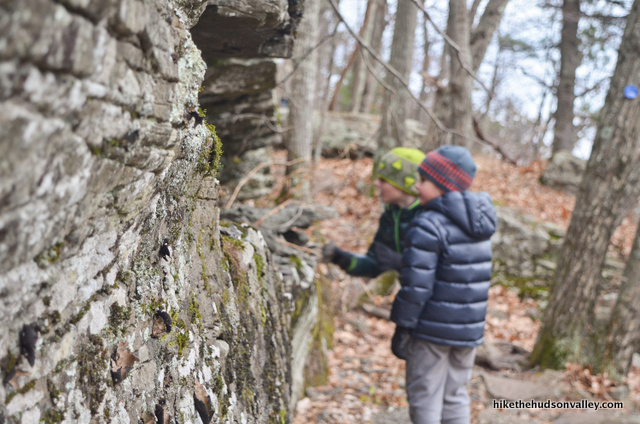
And in less than ten minutes, another view! We’re really racking them up now.
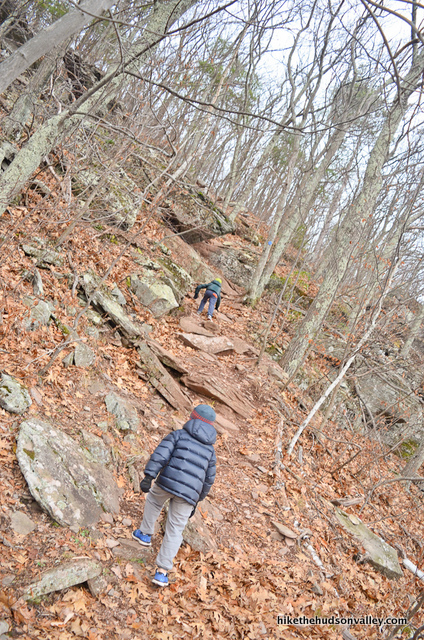
After that view, prepare to gain some altitude.
About five minutes beyond that view, you’ll arrive at your next landmark, the well-marked junction with the Yellow Trail to Schutt Road. Ignore the Yellow Trail and keep heading straight on the Blue Trail. Only .27 miles to Inspiration Point from here! (My GPS clocked it at .43 miles, but what’s a baker’s tenth of a mile among friends?)
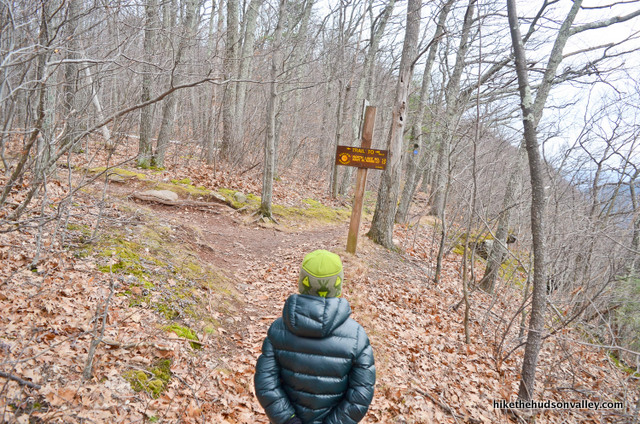

15. From the junction, it took us about 15 minutes to reach Inspiration Point. Along this stretch, my kids started referring to it as “Inspiration Station,” which is objectively more fun to say. Feel free to make the switch like we did.
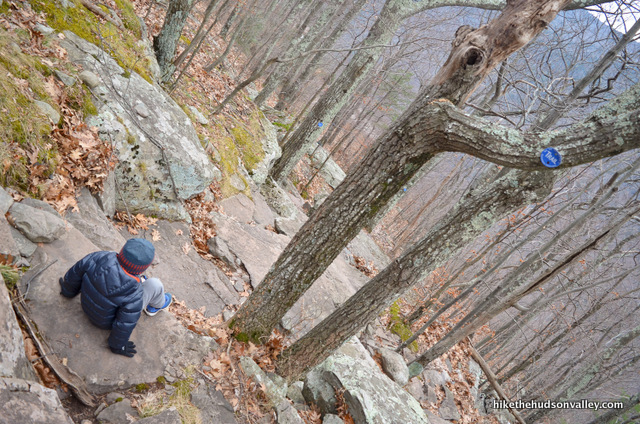
During that 15 minutes, you’ll pass another nice view, then you’ll drop about 120 feet in altitude. Try not to think about how you’re going to earn it back later. Also, in hiking, as in life, there’s no shame in sliding on your butt when you need to.
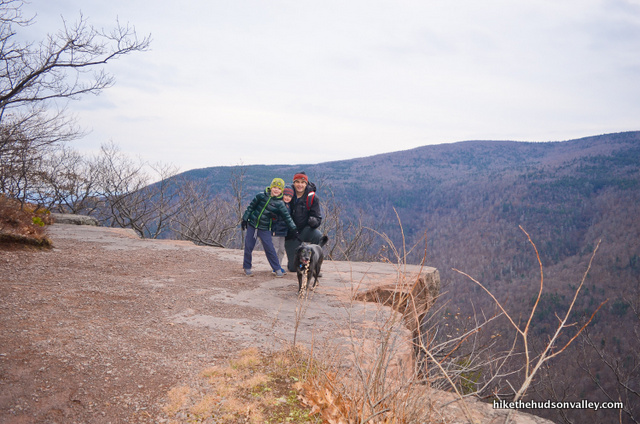
16. You’ll know you’ve arrived at Inspiration Station when you come down that steep hill and emerge onto a long, rocky section of cliff.
I’ve seen pictures of an old “Inspiration Point” sign here, but as of our visit in December 2017, that sign was nowhere to be found. No worries. You notice all that inspiration coursing through your being? That means you’re here.
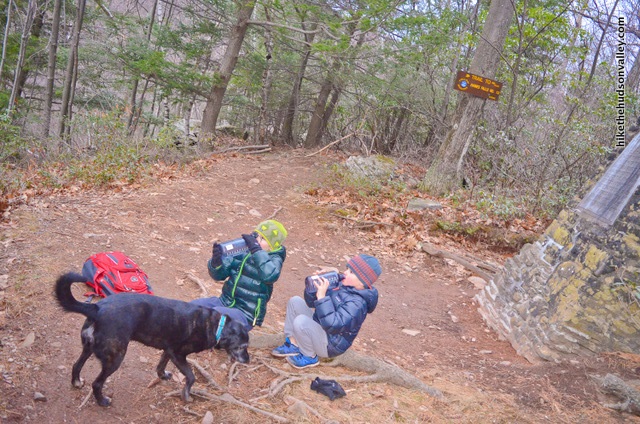
If you’re anything like my kids, you’ll also feel inspired to eat some cookies here.
Take one last look at Inspiration Station, take any final selfies, and prepare for the return trip.
**UPDATE July 2019** According to two quite credible comments below (here and here), this spot is actually Sunset Rock, and the current REAL Inspiration Point is another five minutes down the trail. According to Mike Conmy’s comment (complete with a quite convincing picture from the map at the trailhead), it’s only another 150 steps or so to the next view, and well worth the few extra calories. You should check it out and tell me how awesome the view is that we never saw! (Don’t worry, I won’t tell my kids.)
17. Retrace your steps back to the junction with the trail to the lower falls. It took us just over an hour to get back there:
12 minutes back to the trail junction where you’ll go straight to continue on the Blue Trail.
Another 29 minutes back to Layman’s Monument. Whew, gotta hydrate.
And another 20 minutes back to the trail junction with the yellow-blazed trail to the lower falls.
You can continue straight from here if you’re inspired to go back to your car, following the trail back to the junction by the bridge (then over the bridge, past the platform trail, and back to the parking lot). If you choose to end your adventure that way, hope you enjoyed the day, and kept a little inspiration to bring home with you! If you’re knocking out the Full Monty and visiting the lower falls (highly recommended), proceed to the next step, and let’s do this like Brutus!
18. Turn downhill (a left, if you’re coming from Layman’s Monument; a right, if you cheated and skipped here from Step 9) onto the Yellow Trail to visit the lower falls. I love that this trail exists – getting between the lower and upper falls used to be dangerous, unsustainable, and illegal. Now it’s just a pleasant stroll. A pleasant stroll with a million steps. But we’ll never complain, because a million steps is far better than no steps at all.
Follow the Yellow Trail down, down, down.
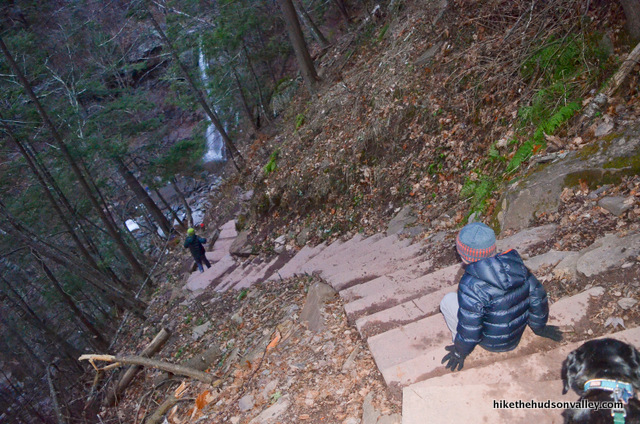
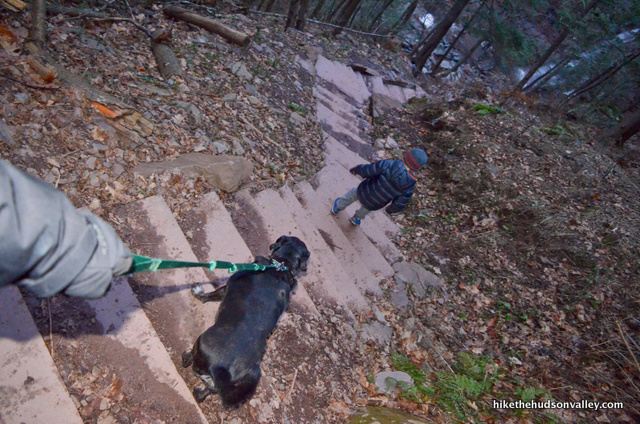
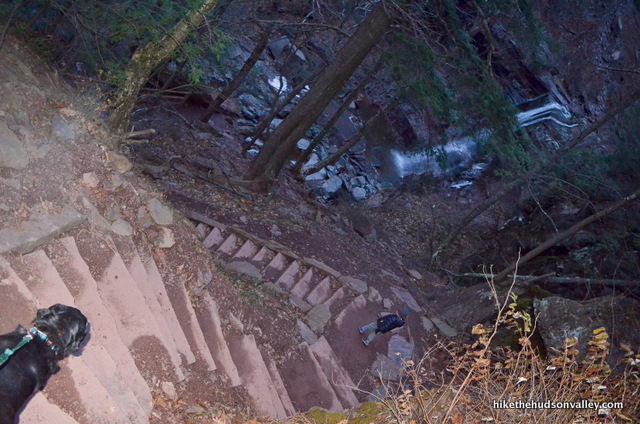
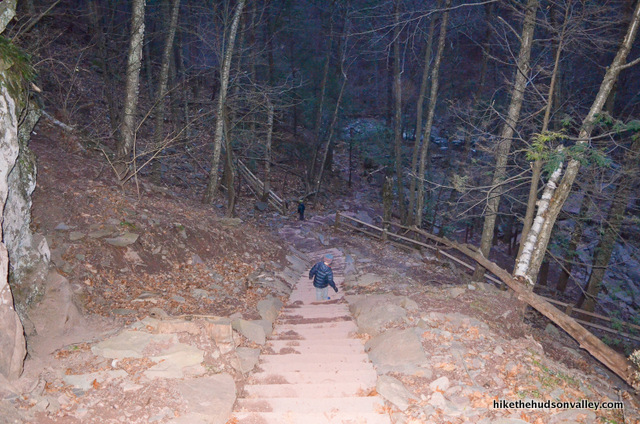
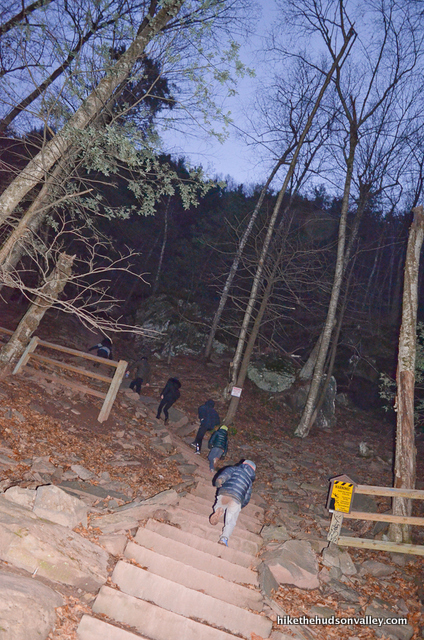
As you get close to the falls, you’ll descend some very long, curvy staircases. Once again, no shame in sliding on your butt. (And to the trail crews who installed these steps: Awesome job! Thank you!!)
As you approach the falls, when you see a side trail venturing off to your right, go check it out.
In just a few feet, BOOM! Kaaterskill Falls in your face!
The trail to this spot also didn’t used to exist (at least not in any official, safe capacity). Now you can feel the mist of the falls on your face without risking the rest of you. Take a moment to soak it in, and soak in it.
19. When you’re done reveling in this spot, return to the fork and turn right/downhill to continue descending those steps. Do your best to suppress the urge to think about what it’s going to be like to traverse these steps going the other way. Carefully plunk your way down – nature didn’t provide any railings here. More butt sliding? Absolutely, fire it up.
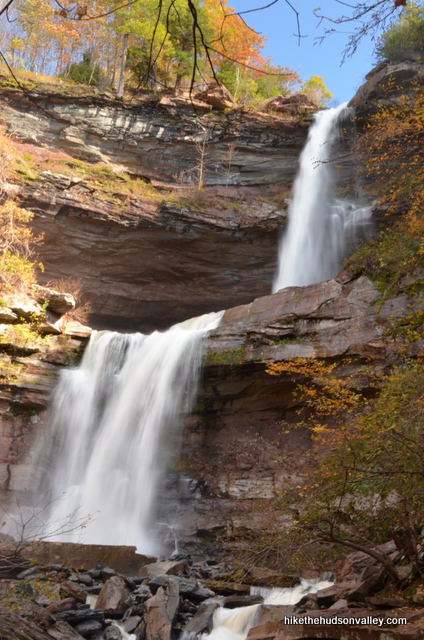
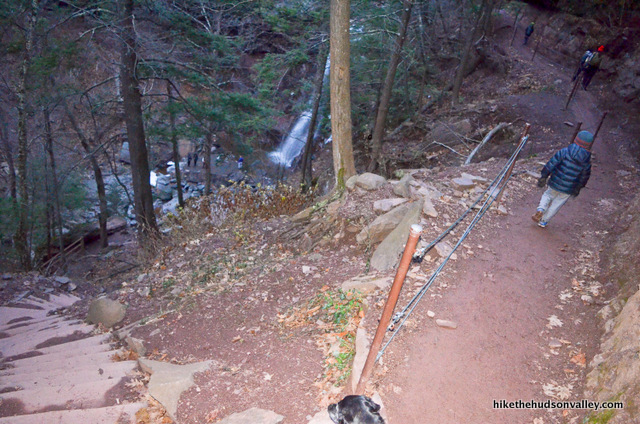
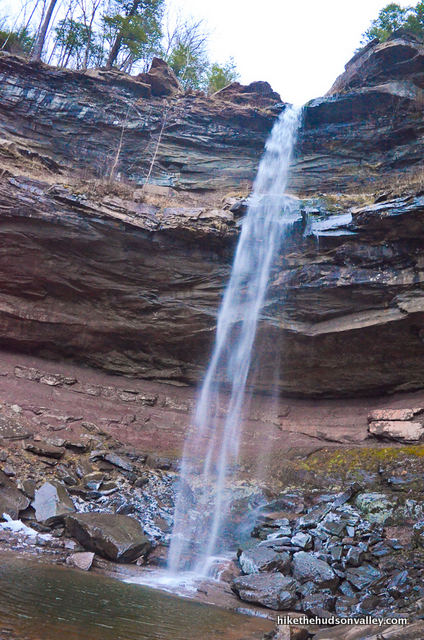
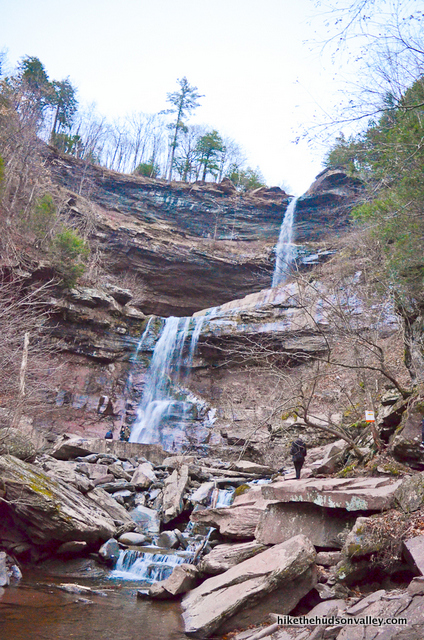
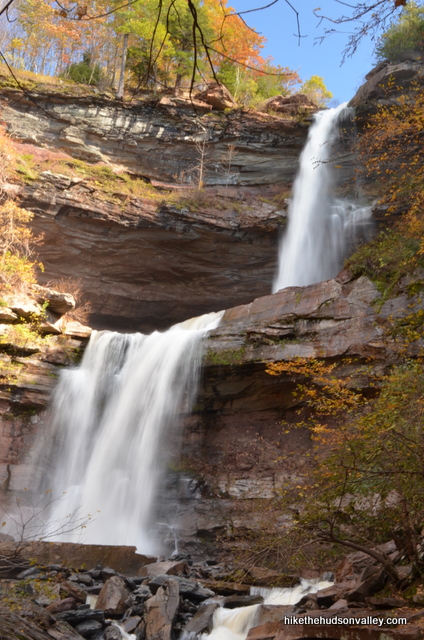
Once you pick your way down to the bottom, you can see both tiers of Kaaterskill Falls in all their glory.
This is one of the best vantage points in the Hudson Valley, or anywhere else. Let your eyeballs feast on this two-tier beauty sandwich.
20. Once you’re done appreciating the grandeur of Kaaterskill Falls and communing with your fellow waterfall oglers, retrace your many, many steps back up those stairs. (Don’t worry about the lack of daylight, kids – Daddy has this under control, even though he may have accidentally left the flashlight in the car.)
It took us 17 minutes to reach the junction with the Blue Trail, all the way back up above the falls. (And really, always keep a small flashlight in your pack. If only someone had made that their tenth hiking tip!)
21. Turn left onto the Blue Trail to head back toward the cool footbridge.
22. In less than five minutes, you’ll arrive at the Blue/Yellow junction right before the footbridge. Turn left/straight here to hop back on the Yellow Trail and head across the bridge.
23. From the bridge, continue straight all the way back to your car.
Awesome day out there? Indeed. Whatever adventure you chose for yourself today, I hope you give it an enthusiastic thumbs up.
Also, I hope you saved some Cheez-Its for the drive home. You saved some Cheez-Its, right?
Directions
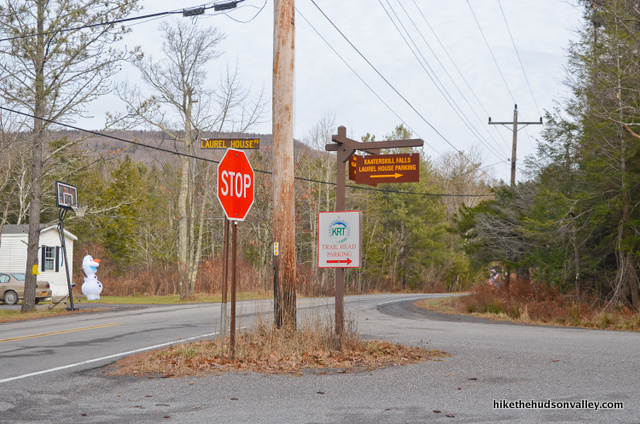
Directions to the trailhead: From Palenville, take Route 23A west as it climbs into the Catskills beside Kaaterskill Creek. In about 3.5 miles, you’ll come around a hairpin turn with Bastion Falls and the trailhead to your right. Continue up the hill another .3 miles to pass the parking area for the lower trailhead (not where we’re headed) on your left. Keep climbing Route 23A west towards Haines Falls. Just a couple minutes past the lower trailhead parking, take a right onto County Route 18 (North Lake Road), then follow it to Laurel House Road on your right in about two miles, which is also marked for “Kaaterskill Falls Laurel House Parking.”
Arrive at the large parking area on your right.
Hop out and let the adventure begin!
You can also get directions by checking out the Kaaterskill Falls II (upper trailhead) entry on the HiketheHudsonValley.com Google map.
Sorta nearby address for your GPS: You can just type “Kaaterskill Falls Viewing Platform” into Google Maps and it’ll pull up the correct spot. (Don’t do “Kaaterskill Falls trailhead,” or it’ll take you to the lower trailhead.)
GPS coordinates of parking area: 42.19577, -74.06303 (Clicking will open in Google Maps or the Apple Maps app, depending on your browser/device.)
Resources & Interactives
Google Terrain Map of hike route:
Super-cool Google Earth flyover of hike route:
Related resources: If you’re looking for actual facts and/or useful information, visit these resources:
- A great write-up on the new trailwork on HudsonValleyOne: On the rocks: The new Kaaterskill Falls Overlook
- My original trail guide for Kaaterskill Falls (lower trailhead)
- The very informative Kaaterskill Falls Wikipedia page
- A two-minute local ABC news clip on the falls and safety improvements
- This beautiful HDR picture of Kaaterskill in all its glory
- A nice trail guide for the lower trailhead from Catskillmountaineer.com
- A Facebook post about overcrowding (and irresponsible behavior) at Kaaterskill Falls from the informative Kaaterskill Falls page
And some more links regarding the danger that abounds if you wander off-trail:
- Man falls to death at Kaaterskill Falls
- Another death at Kaaterskill Falls
- Death in the Catskills – Should this trail be closed?
- Chicago teen Abraham Mendoza dies in fall from N.Y. waterfall
- Dutchess County woman, 23, falls 180 feet to her death in Greene County; 2nd fatal accident on trail this summer
- Newburgh hiker falls to death at Kaaterskill Falls in Greene County
- New Jersey teen falls to his death at Kaaterskill Falls in Greene County
- Woman Falls, Suffers Head Injury at Kaaterskill Falls
- Two Hurt in Separate Incidents at Kaaterskill Falls
More Kaaterskill Falls pictures from the hike’s Flickr album:
Was this trail guide useful to you? Please leave a comment!
Want to support trails in the Hudson Valley? Here’s one great way: Visit the New York-New Jersey Trail Conference homepage and click on Volunteer, Donate, or Shop! (Then you can volunteer, donate, or shop, depending on your mood.)





I love your website for all your excellent details BUT stating that the trail to the viewing platform is wheelchair accessible and “gently” sloping down to the viewpoint is not detailed enough and therefore misleading—with significant implications for us who arrive with a person in a wheelchair. We were there this week and didn’t know it would be .3 miles on uneven surfaces *significantly downhill* (which means a long difficult trip back up). You need to add more details and consult with someone who uses a wheelchair to add to this entry. We were not prepared because we had the transport wheelchair with the small wheels, not the very large wheelchair, so that would be the first point to add. The transport wheelchair doesn’t roll easily on the shale. Secondly, your photos and descriptions should include .3 mi *downhill* (right now your picture looks like a smooth short path followed by the viewing platform photo). We were lucky that there were people to help push my mom back up. We made it to the spot where the description of The Clove is but couldn’t have pushed her back up that last long stretch that’s a steeper grade down to the viewing platform from there. So mom saw nothing but a photo. And she rattled and bounced down and back. She did enjoy the kindness of strangers on the trail though when they helped me push her back up.
MG, I am so sorry for the experience that you and your mother had here, and appreciate you sharing this feedback to help others avoid the same fate. I’ve added a “Note of caution on wheelchair accessibility” at the end of the background section above, linking down to your comment. Please let me know if there’s anything else I can add there that might be helpful to others who would like to attempt this hike with a wheelchair. I’m also sorry for not including details that would have been helpful for you to know beforehand, and hope that the new section above will help to give a more holistic view of this hike so that people can make more informed decisions. Many thanks to you, and here’s wishing you and your mother many more happy adventures together out there.
Did this trail today but from Scutt Rd trailhead instead. So how many stairs are there anyway? Wasn’t as bad on the way out as I thought, however we’ll see what my legs say tomorrow . My boyfriend found this trail on our trip from WV to ME, and even through they were calling for rain all day I talked him into going. It was one if the best falls we have seen. He even compaired it to a water fall we saw in Yocimmittie (spelling) National Park.
Is there a Trail Guide suitable for printing?
Hi, Michael! Brevity is not my strong suit — you might need to spend a ream or two to print these trail guides out. If you have an iPhone, though, you can save this page (or any other) to your reading list, which you can set to be accessible even when offline (that was the default on my phone). Instructions for doing so can be found on this Apple support page. (I assume other phones have this capability as well.) Hope that’s helpful, and thank you for the question!
Good post fellas!
Thanks, Alan!
I was at Kaaterskill Falls on 7/13/21. The parking lot on 23a for the lower trailhead is now officially closed and blocked with concrete barriers. The upper trailhead is now your only option for parking.
Thanks to Sarah’s comment below, I did the viewing platform + falls first then inspiration point, versus the steps listed on this page. Went during the week around 9:30am, but when I got back down at 1pm the lot was full! lots of people roaming around. So if you want the falls to yourself, get there earlier! i’m glad I did. Trails were very well marked and it was a good challenge. personally the steps to the falls wore me out more than the entire inspiration point trail to begin with. all in all had a lovely day, excited to see the falls in all its glory in all four seasons.
Did this hike in reverse order on Saturday and it was lovely. Closing with Inspiration Point was nice because it’s a bit less crowded than the falls and it felt good to end the hike with relative solitude.
There’s not much ice left on the trail except down at the very bottom of the falls, which made me wish I had thrown my micro spikes into my bag. The trail out to Inspiration Point is really sloppy — I was glad I wore my waterproof boots and wound up taking a lot of mud home with me. Worth it!
Thank you so much! As novice old timers hikers this is exactly what I was looking for (from parking lot and back + various trails + what the heck are those steps about) as you answered ALL my questions about any point where we might be risking life of limb! You and your boys rock & we couldn’t appreciate you more! Heading off to check it all out today! Thank you, thank you, thank you!!!
Thanks so much, Lisa! (I read your comment to the boys, too – they appreciated it!) Hope you had a wonderful trip there today!
Thanks for this guide. Here is one variation we hiked the other day. We did the falls first, then hiked out to Inspiration Point. Our legs were pretty tired from the stairs at the falls and the rocky trail, so on the return, we we decided to take the short yellow connector trail that you mentioned in steps 13 & 17. The sign (and map in the parking lot) now shows that it is a 0.1 mile connection to the Yellow Horse Trail (sorry, I did not take a picture). So, we took the short connector trail, turned left onto the Yellow Horse Trail, then a left onto the Scutt Road Trail, and finally a left to get back to the bridge to return to the parking lot. It sounds like a lot of turns, but it is a much smoother, wider trail and quicker way to return to the parking lot. The downside is that there are no views (other than of the forest) on the way back.
One edit to the end of the 4th sentence: “we decided to take the short yellow connector trail at the trail junction that you mentioned in steps 13 & 17”.
Thank you so much for this…we were sure to pick up some trash left behind by other inconsiderate hikers (trying to pay it forward.) I felt obligated to comment that “step 16” has not been updated to include the other vantage point! This stops at “Sunset Rock.” Go the extra 150 steps, because it would be a shame to miss what is the true Inspiration Point! [Zoom into the area noted on the picture of the trail head map for confirmation!]
Mike, THANK YOU SO MUCH for the follow up! I swear I updated Step 16 back in the day, but the record sure suggests otherwise. Perhaps I accidentally trashed the changes? In any event, thanks to you, the problem is now rectified. Step 16 is properly updated with the advice to continue on for another five minutes. Really appreciate you pointing that out. And on behalf of all the people who won’t have to look at it now, thanks for picking up some trash, too!
First, thank you for putting SO MUCH useful and easy to follow information out there! We are taking a motorcycle trip there this Saturday and it is obvious from your photos that we will be parking in the upper trailhead parking lot. Not sure how much time we will have to hike down but once again your photos are really helpful. After we leave there we are going to ride to “Peekamoose” on route 42. I will post some pictures and comments after our trip!!
Thank you, Yolanda! Hope you all had a great trip!
We are from San Antonio, Texas, and had never heard about Kaaterskill Falls until my husband found your post. I read the whole thing and was laughing hysterically and reading excerpts to hubby. We are on an eight-month journey around the Northeast in our 5th wheel trailer. We park the trailer in a campground and take excursions out from whatever campground we’re in. Thanks for all the info on this hike. We love waterfalls!
Aw, that makes me happy, Susan — glad to hear that someone besides my mom thinks I’m funny! (My wife is still on the fence. ) Sounds like a North-South Lake campout with a Kaaterskill excursion would be perfect, and it sounds like an awesome trip that you’re on! Enjoy the rest of your travels, and I hope you have a wonderful visit to the Catskills if you decide to drop by!
You are my official trail guide! I appreciate all the info you are providing, making my hikes safer and anxiety free. My goal is to finish most if not all the trails you’ve been to. Keep posting!
Thanks so much, Jude! Happy adventuring out there – hope you enjoy them all!
Hi Mike, just loved your commentary on the hikes at Kaaterskill Falls. We hiked today, Friday, and no problem with crowds, it was chilly too which probably helped keep folks away, Anyway, we appreciated the information you shared, it gave us a clear idea of the layout. If we’d headed out on our own we’d probably have parked at the Lower Falls area, so glad we didn’t. The Falls are absolutely amazing, everyone should experience their glory. We took the Inspiration Point Trail, views were spectacular but we did not make it to the final view point, quite frankly we were cold so we headed back. We will be back in the Spring. Thanks for your blog, your kids are precious!
Thanks so much, Joan! Glad this guide was helpful to you, and kept you from having to play Frogger on the road to the lower trailhead. Enjoy making lots of new friends out there when you come back in the warmer weather! 🙂
So we made it. Went there yesterday (Sunday). Arrived at 12:30P. Was a cold (low 40’s) day but no rain. There is a Forest Service employee in a vehicle at the entrance watching to make sure no one parked on the road (I’m guessing they are only there on weekends.) We got the last open spot in the parking lot!! Once it fills, one of the Forest people get out of the car and start stopping traffic from entering until someone leaves. So you may just need to wait in line for a while. Looks like most people go to the viewing platform and back which takes probably 20 min max. So always someone leaving.
The falls themselves were moderately impressive as I live right by Snoqualmie Falls in Washington State. In Spring with more runoff I’m sure the flow is more impressive and on a hot day it would be fun to hike down and walk underneath.
Easy to get to on good roads, I guess that’s partly what makes it so crowded. And boy was it crowded and I’m sure this is nothing compared to the Summer tourist season. I would only recommend going there if you happen to be in the area. Based on my travels all over the U.S., not something I would drive a few hours just to go see only that.
We can’t make it to the trail before noon. Assuming the upper lot is fall, if we are only going to the platform and back (probably max 20 min) would it be a pretty safe bet to park the car on the road with minimal chance of getting a ticket due to the short stay? I would imagine the ticket person comes when there’s the most cars to make the most money. But maybe that’s noon! LOL
I’m sure lots of people don’t make it before the lots are full so no one is going to be crazy enough to drive all that way and turnaround without seeing the falls.
Nobody can say for sure when they’ll be around to issue tickets. Your best bet is to wait it out – there are constantly people coming in and LEAVING the lot. It may be hard to find a spot to wait though; it’s very tight in there!
Hey Jeff – I agree w/ Denise. I have no idea how often they come around to ticket, but it sounds like it’s pretty regular, and hurrying through the hike so you can get back to your car before it gets ticketed doesn’t sound conducive to enjoying the whole experience. If I were you, I might revisit the whole “can’t get there before noon” thing if at all possible. I will sometimes wake up before dawn (4:00am or so) so that I can arrive at a trailhead right at sunrise. If waking up that early didn’t suck, everyone would do it, then there would be no advantage! But it does suck (quite mightily), so the advantage is all yours! Just for reference, last weekend, I drove by the large Mohonk parking lot at West Trapps and it was already full at 10:13am. I expect the situation will be similar at Kaaterskill, especially during foliage season. Whatever you decide to do, I wish you the best of luck! May the wind be at your back, may the falls be flowing well, and may nothing be tucked under your windshield wiper upon your return.
This was very informative. Perfect hike, great directions. Heads up people as we were leaving the laurel house rd parking lot all the cars parked along side of the rd in no parking spots were getting tickets and there were about 50 cars parked illegally. There are other parking areas around north south lake. Get here early. By 11 this place was crowded on the weekend.
This was THE most helpful trail info I have EVER read; planning to go next week and I now feel fully prepared and am psyched! Thanks so much…enjoyed the humor too 🙂
Thank you so much, Jojo! Hope all goes well with your adventure here!
Wow! Thank you so much for the detailed instructions! I’m going to go this weekend. I’ll try to write a follow up about how it goes! But this definitely gives me confidence since I really had no clue where to go or where to start! Thanks so much for taking the time and effort to post this!!
I hiked down from the upper trailhead many times in the late sixties/early seventies. “Trailhead” is not the right word, as there wasn’t much of anything to denote any formal trail. You had to know where it was. It was hair-raising, as there were no stairs, no real trail other than an eroded hillside. Hiking down was more like sliding down. You’d aim tree to tree to stop your descent. Well worth it. It was terrific in winter, when the falls froze. Dangerous as can be, but awesome. I had no idea then that this was a world famous destination in the 19th Century. I now have a two page Harper’s Bazaar spread of the area drawn by Thomas Nast on my wall.
What a perfect trail guide! I’ll be screen shotting a bunch of these pieces of advice and direction for our journey this weekend. (I’m a little nervous about the crowds ) We’ll be traveling with our 12-year-old son with autism. It’s nice to see reviews and guides like this to help us make the best and safest decisions for him.
Follow up – what a wonderful journey we had! It was exactly as described in this guide, and was very easy to navigate the well-marked trails. We parked at the Laurel House parking lot and went first to the viewing platform and then to the lower falls – that trail was a nice mix of rocks, roots and dirt. A little mud, too. Coming back up was moderately challenging with those never-ending stairs! But there were people from all walks of life accomplishing it, from small children to seniors – even dogs! We did hear what we believed to be a rattlesnake, but did not actually see it. This is a photo of my husband and son on the Viewing Platform.
LOVE your site as you have given our family great insights into appropriate trails and awesome tips.
We went to Kaaterskill Falls this Sunday and it was crowded! We were in the Laurel House parking lot at around 10AM and it was near capacity. I have to make a comment here about the Porta Johns here… there were 2 available and it was already filled with Gatorade bottles and other non-biodegradable items.. such a shame that people disregard the signs of Carry In/Carry Out and can’t even make it a few more steps to their cars to dump their garbage….
Anyways, the hike to see the Falls was definitely worth it. The Falls were definitely gushing from the rains all week which did make parts of the trail muddy, slippery and dangerous. Which makes me wonder what in the world is that mom thinking wearing only sandals AND carrying her baby down the trail… the lack of appropriate footwear on some visitors became more evident as we continued on the trail…. the mist from the Falls gave us some relief both going down the trail and back up again (especially after that strenuous steep staircase from the lower part of the Falls to the Upper Falls…
past the Lower Falls we followed the trail that leads to 23A.. and surprisingly, this part was pretty quiet and was great to be able to follow trails that had streams of water intersecting throughout. NOW I get why the official trail map lists “(aqua)” on certain paths… the crowd did pick up again the closer we get nearer to Bastion Falls…
I guess the crowds all congregated around the Falls and stopped there. We also saw a whole extended family take over a bank with chairs, coolers, picnic items and I think a small grill (I HOPE THEY CLEANED UP AFTER THEMSELVES!!!!)
This was a great hike with a watering hole which is always a great incentive for our kids (we went further downstream to let our kids dip their feet in the water!) Next time we definitely will also go to Inspiration Point.. I just hope this wouldn’t be on its way to becoming a ruined natural site due to the crowds and certain lack of respect for the environment and other fellow hikers/visitors….
Thank you so much for this guide! I followed it to the T except for the ending…we had someone pick us up from the bottom trail !
This guide was so super helpful and it made me feel confident in what we were doing on the trail!
Thanks!
Thank you, Amy! Kudos to you for the innovative shortcut, too 🙂
In the Catskills for the first time from California. THANK YOU for the detailed information, photos, and humor. This is the best trail review that I have ever read!
That’s really wonderful to hear, Lisa — thank you so much! Hope you enjoy your time in the Hudson Valley!
Thank you for the detailed instructions. Having to drive 2 hours from Jersey, I really appreciate you taking the time to detail everything so we know what to expect when we get there and have an easier hike.
Thanks so much, Iva – have a great hike!
Just got back from Kaaterskill falls. Loved it! We followed your instruction and did both trails. We didn’t have time for the railroad trail so we’ll have to go back and do that. People need to come really early to hike here. By 10:30am all three parking areas were full.
The view from Jennifer’s spot 🙂
Nelli, thanks for the sharing your photo on the site’s Facebook page, too — it’s added to the trail guide above. Very much appreciated!
Long time fan of this blog, you have inspired me to do so many hikes in the Hudson Valley, but I don’t think you made it all the way to Inspiration Point, or at least not what I took to be Inspiration Point, not long after that cliff view of Hunter (seriously like 5 more minutes of easy trail) you get an amazing east facing view of the Hudson Valley.
Jennifer, thanks so much for posting this advice (and for your comment on the original Kaaterskill Falls trail guide that clued me into Inspiration Point in the first place – I owe you one!). I’ve updated the trail guide above (at the bottom of Step 16) with your recommendation to continue for another five minutes. It sure did SEEM like there should have been more of an east-facing view, and like there could be one just around the corner. I would love to go back and check it out! FWIW, I spoke with two locals on that spot who assured me that I was standing on Inspiration Point, and the Google Terrain map above also shows Inspiration Point right where we turned around. I’m pretty sure that’s correct, but I’m also pretty sure I might even be more inspired at the view that you mention here, and hope to check it out next time. Thanks for helping others to not miss out!
Haha, I definitely did not consult with GPS or any locals when I went out there! I was just going to the falls and saw the Inspiration Point trail sign and since it was a gorgeous summer day I thought why not? So I headed out that way for what felt like the appropriate distance and found a great view and decided that must be the spot 🙂 Perhaps they should think about reinstalling the sign!
I think your Inspiration Point sounds pretty awesome, Jennifer! Check out this page when you get a moment: http://www.catskillsearch.com/site/2010/10/25/inspiration-point-sunset-rock-catskill/
According to that page, Inspiration Point has moved! The map at the bottom of the page shows Inspiration Point (former) and Inspiration Point (current). Maybe someone decided you get more inspiration from the current spot? I don’t know, I think the other viewpoint looks about 23% more inspirational. Is that the view you’re talking about? In any event, thanks for clueing everyone in to the second viewpoint! Lots of inspiration to be had out there! 🙂
That is the view! It’s even better when the leaves are out!
Hi Mike,
Going to head up there this weekend. I don’t see the update under Step 16. Should we be looking for FORMER inspiration point?
Also about how long did the entire hike take?
Thanks!!
Oh no! You’re right, Lisa — I sure thought I’d put the update at Step 16 above! I’ll fix that ASAP. For now, the trail guide above takes you to the current Inspiration Point, and you can continue for another five minutes to see the former Inspiration Point (pictured in the link three comments up) if you’re still in the market for some more inspiration. I’ve listed the Approximate Roundtrip Time as 3.5 hours at the top of this trail guide (about a zillion pixels from here). Hope you have a great trip this weekend!